WOULD YOU LIKE TO WORK WITH DANG TRAVELERS?
Our website is steadily growing and hitting new benchmarks every day! We are open to many types of collaboration opportunities including press trips, advertising, travel interviews, product reviews and guest posts. We highlight amazing locations, budget-friendly travel tips and share any resources we come across on our travels.
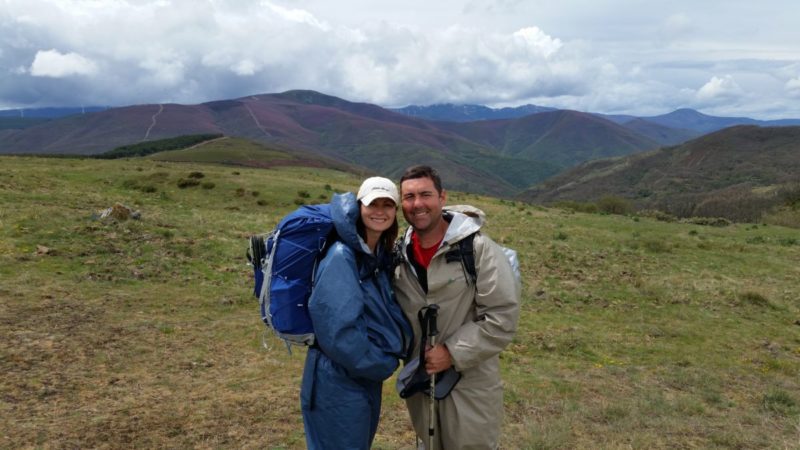
Last year we hopped over to Europe for three months in the spring and summer, hiking 500 miles on the El Camino de Santiago then road tripping through Spain and Portugal. Then in the fall, we took a journey on one of America’s most well-known drives, Route 66, for a road trip of a lifetime.
We love exploring new cities, checking out unique restaurants, and finding quirky off-the-beaten path things to do on all of our trips. We are drawn to the great outdoors and love hiking, canoeing and biking.
MEDIA KIT CAN BE PROVIDED UPON REQUEST
Press Trips or Sponsorships: We are happy to consider all manner of press trips or sponsorships as long as they are in line with our ultimate goals and interests. We will frequently post updates on social media including Twitter, Facebook, Pinterest and Instagram during the trip. We will also create various blog posts for our website documenting and sharing our adventures of any trip.
Advertising: If you would like your ad placed in the sidebar or footer, please contact us below for details.
Travel Interviews: We are open to discuss our travels, website and/or our lifestyle.
Product Reviews: If you believe your product or brand embodies our ideals and is in line with our explorations contact us and we can discuss.
Interviews
Featured On
- Travel Gumbo – Why Missouri is Not just a Fly Over State
- Sunset Travelers – 35 Incredible Couple Travel Blogs to Follow
- Two Drifters – The Most Romantic Proposals Around the World
- Top Travel Couples on Instagram
- Where to go in the USA – Interview with We Said Go Travel

Have any questions or looking for advice on your next trip? Have any topics you would like us to cover or any advice for us?
We would love to hear from you!
Please contact Angela at [email protected]
Planning a vacation to Newfoundland and wondering what it’s like to take the ferry? If you’re debating whether or not the extra effort to get there is worth it, it is! We are wrapping up a two week road trip and the island exceeded our expectations around every corner.
Marine Atlantic Ferry to Newfoundland
Road tripping is the best way to explore Canada’s easternmost province. Click here if you are interested in reading our Newfoundland Road Trip Itinerary with all our suggested things to see and do!
The island is massive with a nine-hour drive between ferry ports. Make sure to read my top 20 tips for Newfoundland travel.
You can fly in and rent a car or bring your own car on one of the Marine Atlantic ferries from North Sydney.
If you are from the United States and are also wondering how to cross the border into Canada by car right now, click here to read about our experience.

There are two options for a ferry to Newfoundland from Nova Scotia; both leave from North Sydney and both offer an overnight ferry to Newfoundland.
How long is the ferry ride to Newfoundland?
The Port aux Basques route runs all year long arriving on the southwest part of the island and is roughly six to eight hours long with two sailings a day.
The Argentia route runs seasonally from June through September arriving on the southeast part of the island and is roughly fifteen hours long. There are only three sailings a week for the longer ferry.
How far in advance to book ferry to Newfoundland. As soon as you decide to visit Newfoundland, I recommend reserving your ferry tickets.
NOTE: Currently, the ferries are selling fewer tickets than normal to allow for physical distancing in the seating area. Every other row is cordoned off.
The summer crossings in July and August are the busiest and book up early.
You are allowed to modify or cancel the reservation within 48 hours of your scheduled departure but there is a $25.00 fee.
We tried reserving tickets in mid-July for mid-August (so a month in advance) and could not get a return ticket on the Argentia route for the night we needed.
Even though it added a lot more driving to our itinerary, we ended up taking the Port aux Basque ferry to Newfoundland and back because of the limited availability.
With only three sailings a week, planning ahead is highly recommended.
Since we didn’t book far in advance, we were disappointed to discover all the private cabins were reserved already as well on both ferries.
But since we ended up taking the daytime ferry both ways and with the comfortable seating area (more on that below), we ended up being happy not to have spent the extra money. A cabin is an additional fee on top of the passenger and vehicle charges.
All Aboard! Here’s what to expect on the ferry ride.
Once you book your reservation, you’ll be told to arrive at least two hours prior to departure to check in, or your tickets might be voided and given to another customer.
I thought a two-hour window was a little ridiculous since the ride is six hours long but I didn’t realize the ferry starts loading passengers early.
We arrived at 10:00 am on a Sunday for our 12:15 pm departure and they began announcements for loading at 10:20 am and began filling the ship at 10:40 am.

For check-in, makes sure to have your reservation number and a valid government-issued photo like your passport or driver’s license.
During the short wait at the terminal, there is a lounge area with seats, bathrooms, and a water station.


What to Bring On Board
Once you drive onboard, you’ll leave your car and will not be able to access it so make sure to plan ahead on what to bring up.
- Food
- Water &/or Drinks
- Sweatshirt or Jacket
- Binoculars
- Charger
- Earbuds

Even on a warm day, you’ll need layers whether it’s on deck with the wind blowing or inside with the air conditioner on high.
TIP: You can find free comfy blankets near the doors on each floor.
There are normally a few stores, a restaurant, and a cafe available onboard but during Covid, only the to-go options were available at the cafe.

The cafe offers four kinds of paninis for $8.99, slices of pizza for $6.50, pre-made cold sandwiches for $4.99, soup, small salads, some other snacks, and coffee are also available.
We brought our own sandwiches and drinks on so we didn’t try any of the food, but thought most items are reasonably priced considering it’s the only option on the boat.
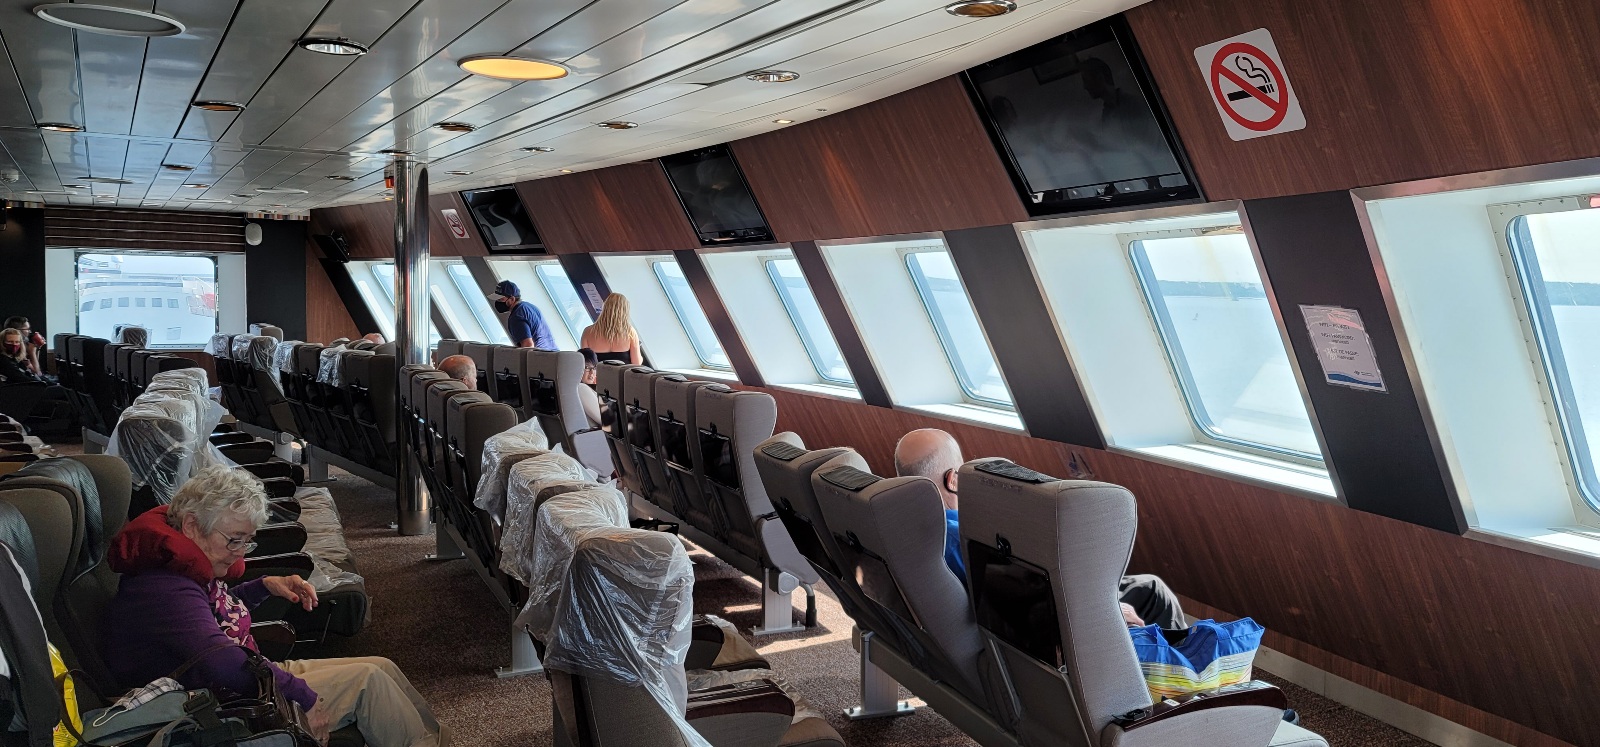
We boarded fairly early and were able to grab a window seat on the 7th floor – open to everyone.
The ferry has WI-FI available on the 8th floor but multiple people said it is spotty. But if you’d like to try for it, make sure to head up to the 8th floor straight away.
Our cell service (T-mobile) worked on and off inside the ferry but outside on the top deck we had a great connection most of the way.
Should You Book a Cabin
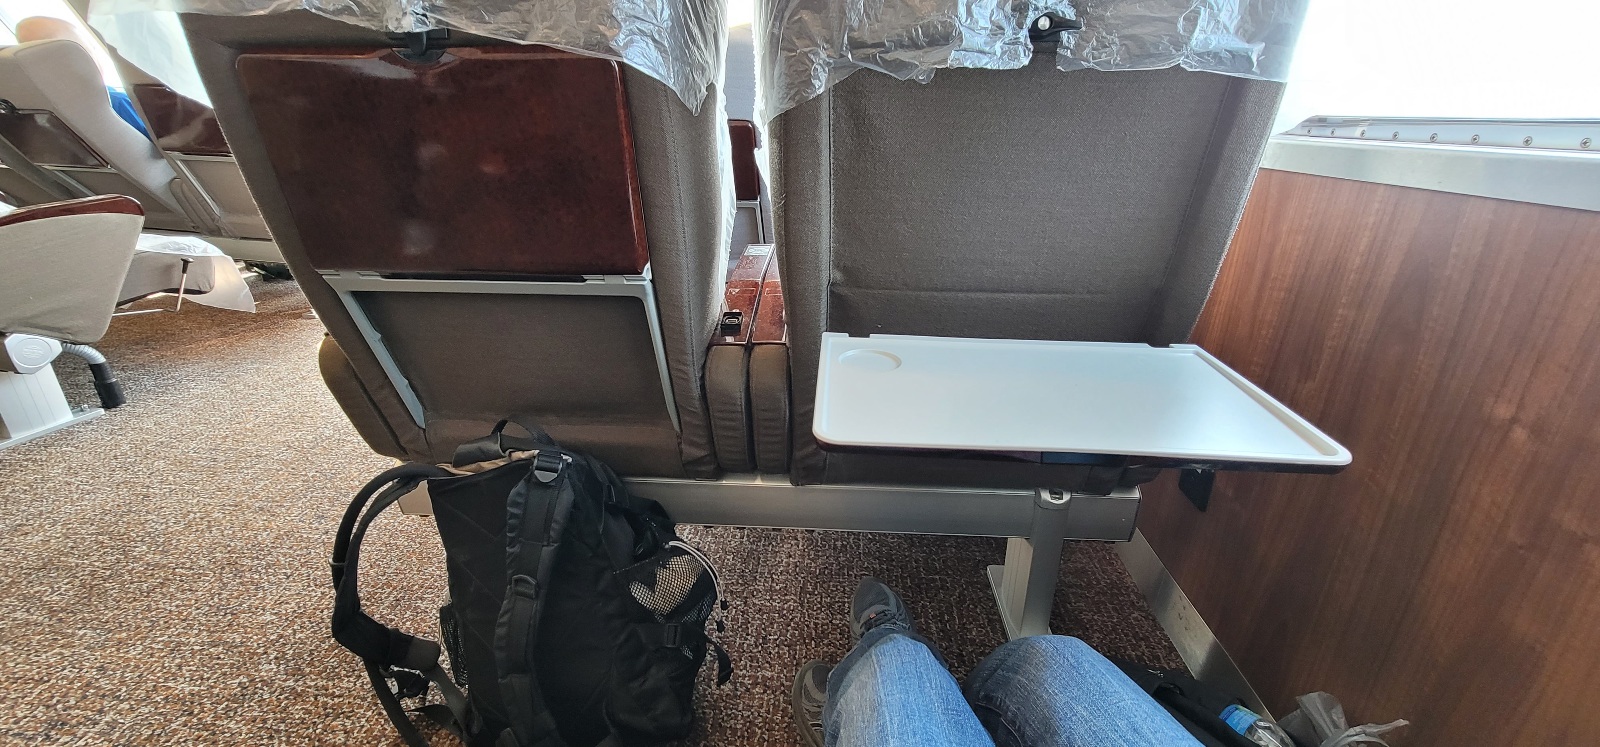
When we saw how spacious the seating areas are and that they have tray tables and USB plugs, we were happy we didn’t spend the extra money for the cabin.
There’s a ton of leg room and the floor is quiet since most people read or sleep.


An overnight ferry to Newfoundland takes 15 hours. It would probably be worth the extra cost for the private bed and bath for a good night’s sleep, but I think you could probably sleep quite comfortably if not.
How much is a cabin on the car ferry to Newfoundland? On the Argentia route:
- 2 bed cabin is $176.75
- 4 bed cabin is $194.50
- Deluxe cabin is $246.50
On the Port aux Basques route:
- 2 bed cabin – day is $53.50
- 2 bed cabin – night is $126.50
- 4 bed cabin – day is $58.50
- 4 bed cabin – night is $139.50
- Deluxe cabin – day is $112.50
- Deluxe cabin – night is $169.25
Will You Get Seasick on the Newfoundland Ferry
Unfortunately, if you suffer from motion sickness like me, there’s a chance of getting seasick on any boat, but luckily the days we sailed it was extremely smooth.
I suggest bringing Dramamine just in case based on the weather.
I almost took one when we boarded, but it wasn’t necessary at all.
Will You See Whales
There’s no guarantee for a whale sighting but we were told you’re most likely to see them around Newfoundland.
And guess what?
That’s where we saw them!
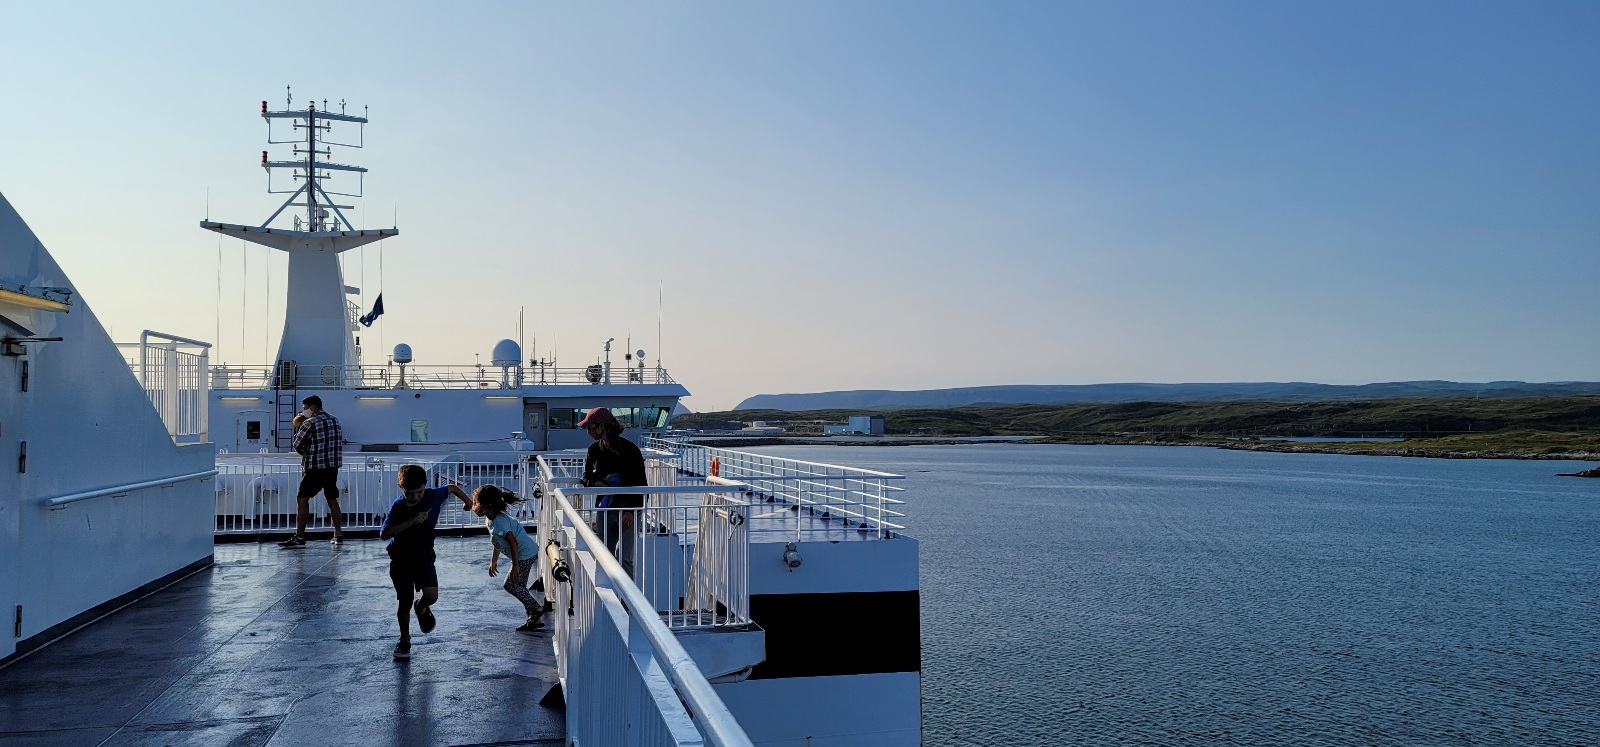
We stood on the top deck for the last hour of the ride and we saw a few spouting in the distance.
Travel Declaration
Once you drive off the car ferry onto Newfoundland, you’ll notice a few lines of vehicles. Here is where an agent is checking for Travel Forms.
Make sure to go online beforehand and fill out the appropriate forms. You Can find the Newfoundland Travel Declaration here.
If you have your confirmation number available when you pull up, the process won’t take but a few minutes.
Marine Atlantic Rates 2023
Rates vary depending on how many passengers and the size of the vehicle you’re traveling in.
For us – two adult passengers and an under 20 foot van – the roundtrip total cost was $403.52 ($320 USD) in 2021.
All current passenger rates below are in Canadian dollars.
Port aux Basques to/from Sydney One Way
- Children (ages 5 and under) free
- Children (5 – 12) $20.34
- Adults (13 – 65) $43.78
- Seniors (over 65) $40.23
Vehicle rates vary depending on the size of your automobile, van, or RV.
- Small autos and pickups 20′ or less start at an additional $114.19 with RVs over 60′ $456.18.
Check the Marine Atlantic for additional rates and NL ferry routes and schedules.
Sydney to/from Argentia One Way
- Children (ages 5 and under) free
- Children (5 – 12) $56.39
- Adults (13 – 65) $116.27
- Seniors (over 65) $105.09
Vehicle rates vary depending on the size of your automobile, van, or RV.
- Small autos and pickups 20′ or less start at an additional $234.19 with RVs over 60′ $933.72.
Check Marine Atlantic’s website for the Newfoundland ferry for North Sydney to Argentia ferry schedule 2023.
Do you have any other questions about taking the ferry to Newfoundland? Ask below!
From finding an open campsite to navigating and tracking the weather, these free camping apps will help you have a great trip.
We’ve accumulated a few favorites over the years during our many road trips where we camped in either a pop-up trailer or our recently converted minivan camper.
Having added and removed many apps that were either outdated, inadequate or simply a replica of an app we already had installed, we believe we’ve finally got the list down to something manageable.
Without further ado, here is our list of the best free camping apps and how we use them to find a place to stay, navigate, and plan our outdoor adventures.
- Free Campsites
- RV Parky
- iOverlander
- Campendium
- Chimani National Parks
- WeatherBug
- AllTrails
- Cairn Map Offline
- Offline Survival Manual
- Star Walk 2
- Geocaching
- Pokemon Go
- Allstays Camp and RV
Finding a Campsite
Free Campsites (Android and iOS via web browser)
Free Campsites is the first free campsite app we open when planning a road trip or looking for a place to park for the night at the last second.
As of now, it seems to be the most comprehensive map of free campsites in the U.S. The Android app just opens their website which you can also access via a browser on Apple products. This one is our favorite free tent camping app as it always has the most updated options.
On our Route 66 road trip, we spent the night for free on four different occasions thanks to this free camping USA app. Once near the Grand Canyon, once near White Sands National Park, and twice near Big Bend National Park.
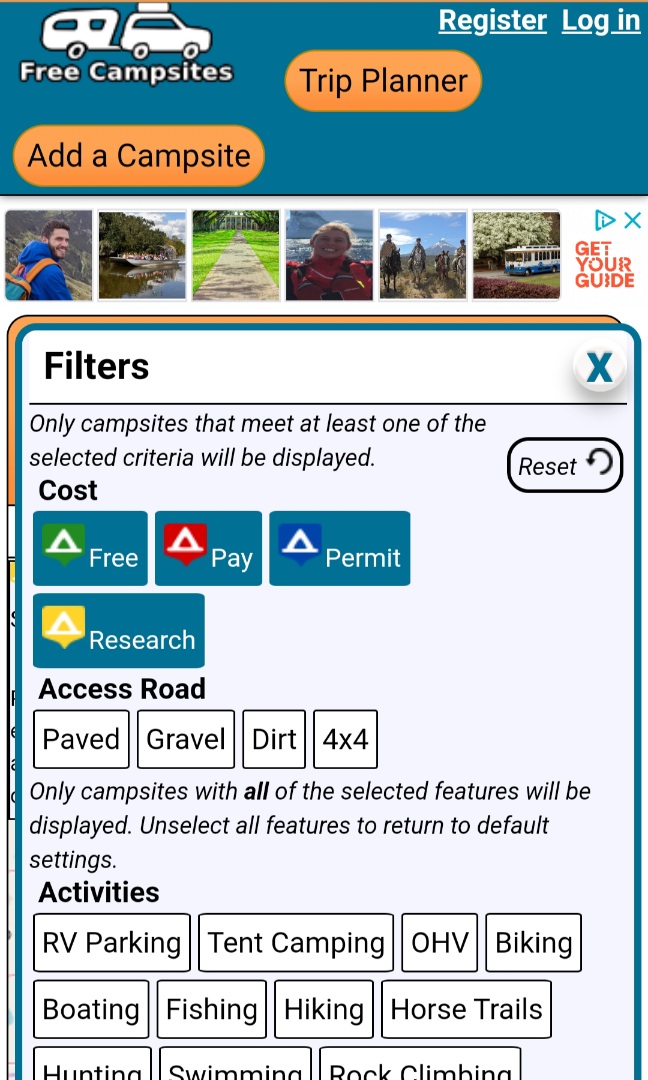
The map is filtered by colored tents: free (green), pay (red), permit (blue), and research (yellow) sites. All are self-explanatory except research means in the phase of being researched so not necessarily accurate information.
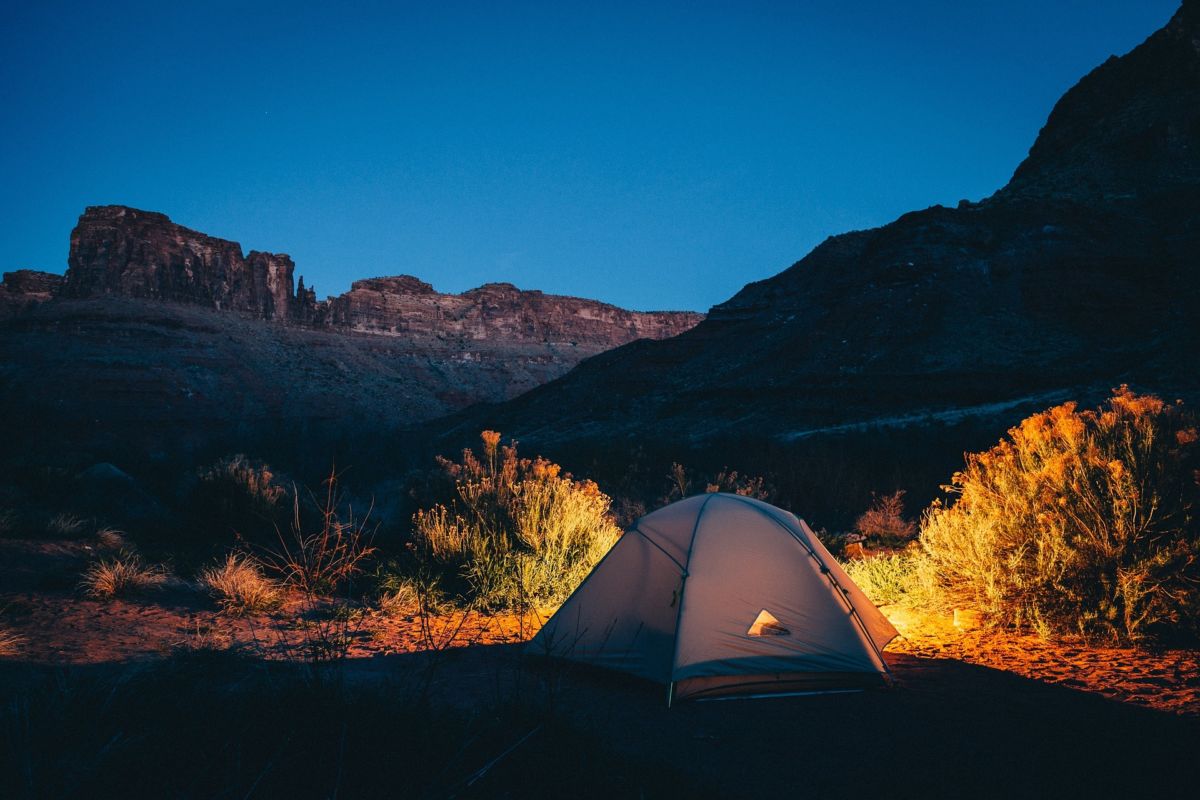
Keep in mind that the free sites will usually not include many amenities- if any at all. Having an outdoor privacy tent and portable toilet comes in handy in these situations.
Plan on most of these sites offering absolutely nothing other than a place to park your camper or set up a tent and you won’t be disappointed. Also, keep in mind that they all have limits on how many nights you can stay, so plan accordingly. Most limits are 2 weeks or less.
Despite these shortfalls, it’s certainly hard to beat the price!
RV Parky (Android and iOS)
If there are no free campsites in the area or you are looking to stay somewhere with amenities such as hot showers, we’ll get our bearings on what is around using the RV Parky app.
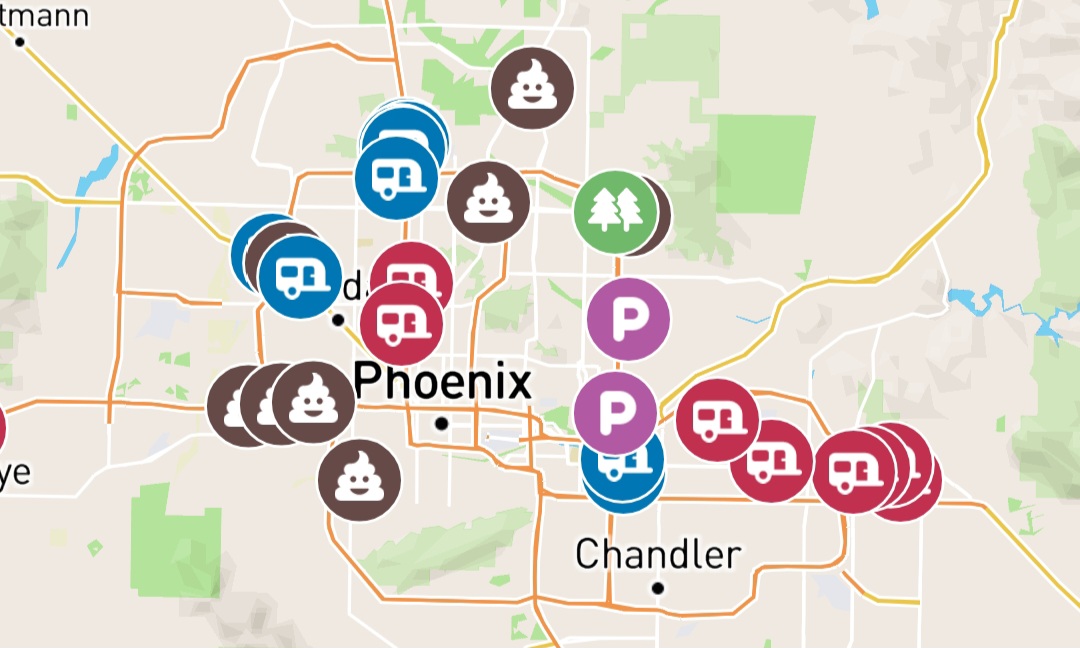
This is the best free RV camping app as it not only includes campgrounds but also has other useful information such as the locations of Travel Centers, Walmarts (it even has a filter for ones that allow overnight parking), Rest Areas, Casinos, a large variety of Camping stores (Cabela’s, Camping World) and even low bridge and road warnings for those driving a larger RV.
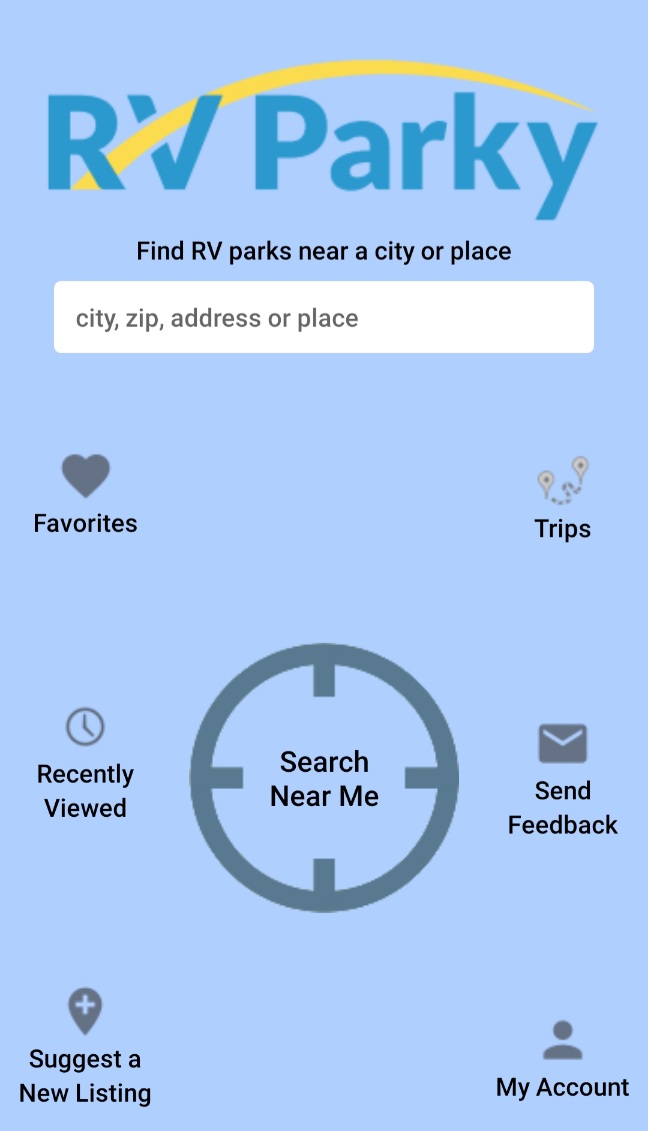
Just click on a campground icon and it will show a pop-up that has the park name, 5-star rating, reviews, price (not always accurate but close), and icons showing which amenities it has.
You can even filter out campgrounds based on amenities, so if you want to see only campgrounds that have shade trees, allow pets, and have Wi-Fi you can filter for those things.
We also appreciate that you can choose whether to see everything on a basic map or overlay a satellite view to get a better idea of what is around without having to go to a separate app for this information.
iOverlander App (Android and iOS)
After using RV Parky to get our bearings and zero in on a potential camping spot, we then use the iOverlander app to get more information, see more reviews, and confirm the amenities are there including information on water, dump stations, and recycling bins.
Occasionally there will be another camping option that didn’t show up in another app that will show up here as their list is quite comprehensive.
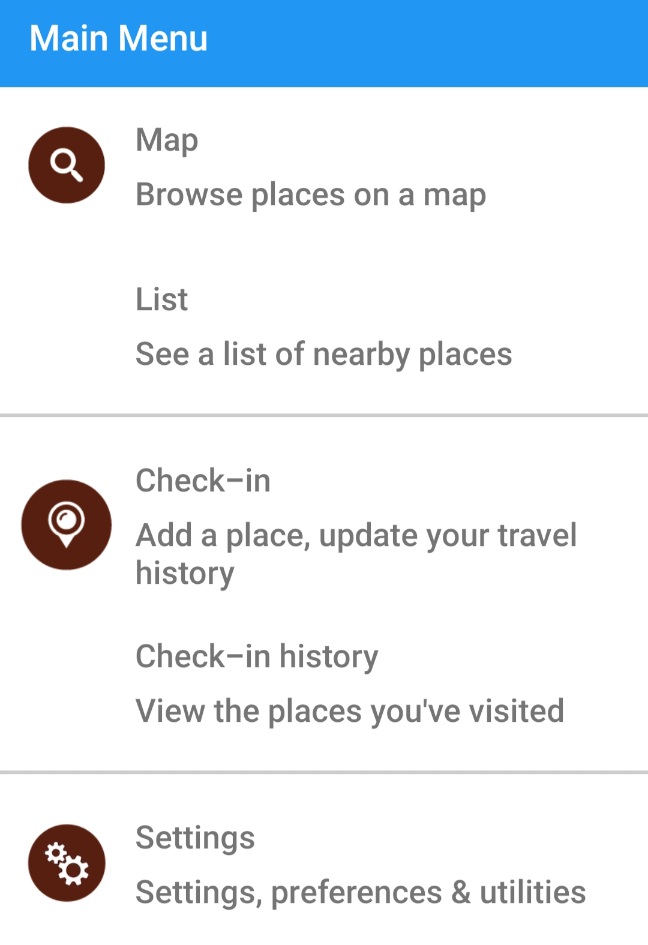
The iOverlander app also has other countries other than the USA available as well: Canada, Africa, Europe, Australia, New Zealand, and the UK.
Here is a list of helpful camping essentials and gift ideas to make your next trip more fun!
Campendium (Android and iOS)
The Campendium app has RV parks, publicly managed campgrounds, parking lots, and dump stations, but it really shines as the best boondocking app with many public land sites.
Other helpful features are sections for reviews, cell phone connectivity information, a question and answer section, and notes from users.
It allows you to search by zip code, city, state, campground, or state park, and has a helpful filter for free boondocking sites.
If you’re interested in truck, car, or van camping, check out these camp gear essentials that will make your travels less stressful and more comfortable.
Navigating
Chimani National Parks (Android and iOS)
The Chimani National Parks app is an outstanding resource for hiking and navigating in the U.S. national parks. We’ve used it many times including Yellowstone, Arches, Badlands, and Canyonlands to name a few.
It includes maps, information, and photos of more than 400 units of the National Park System including national parks, monuments, seashore, historic sites, and more.
The biggest perk of the app is its downloadable feature for maps, hiking information, fishing spots, campsites, and other points of interest since the national parks usually have no coverage for cell phones and spotty Wi-Fi.
It also features notifications about the latest park news, and the ability to earn and collect badges based upon the number of parks you visit.
Weather Report
WeatherBug (Android and iOS)
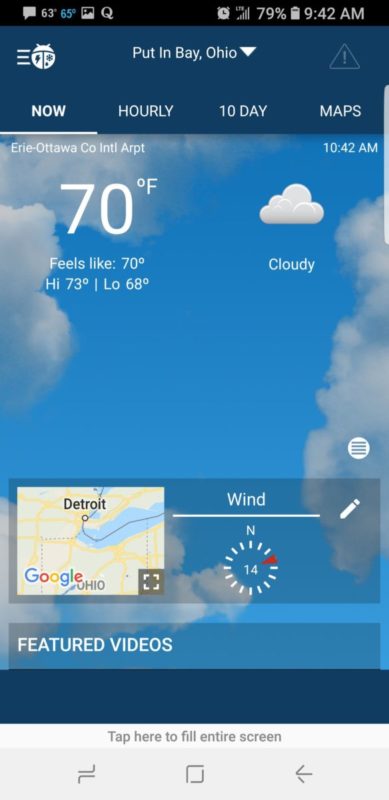
It’s always important to stay on top of weather forecasts when camping and hiking. Wind, rain and lightning are typical trip-ruining events that you should always be on the lookout for.
WeatherBug has detailed weather data to help you avoid any camping catastrophes. Some of its many features include forecasts, radar, lightning detection, local pollen details and alert notifications.
Hiking & Safety
AllTrails (Android and iOS)
Covering over 50,000 hiking trails and mountain bike routes with maps, pictures, reviews, and hiking information, AllTrails is a favorite among many hikers including us.
Follow hikers that inspire you, save trails for future trips, and turn your phone into a GPS tracker so you don’t get lost.
We love reading the reviews before choosing a hike as it gives us an idea of whether or not we would like the trail, where to find the trailhead if it’s tricky, usually, it has the current condition of the trail, and any additional information we may need.
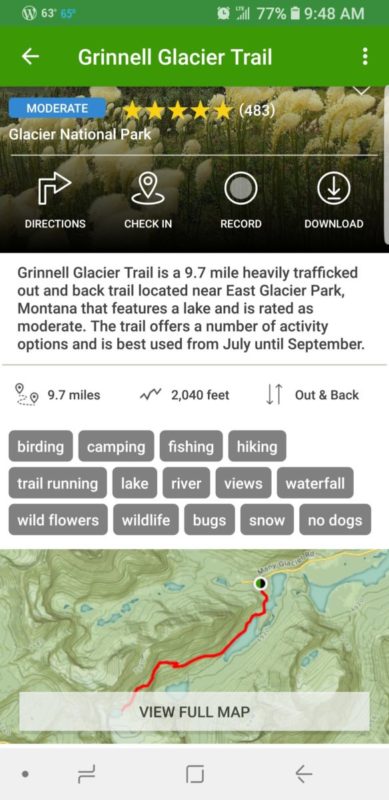
Cairn Map Offline (iOS only)
It’s always a good idea to have an extra layer of safety when it comes to hiking whether you are solo or with a group. Cairn has an emergency call locator with available cell coverage in the area. It allows you to find which service providers will work where in case of a crisis.
If you choose to set up its safety notification feature and it goes unanswered, Cairn will alert your emergency contact. You can record your hikes and it has offline topo maps available.
RELATED: 15 SIMPLE TRAVEL HACKS TO MAKE YOUR NEXT TRIP CHEAPER
Offline Survival Manual (Android only)
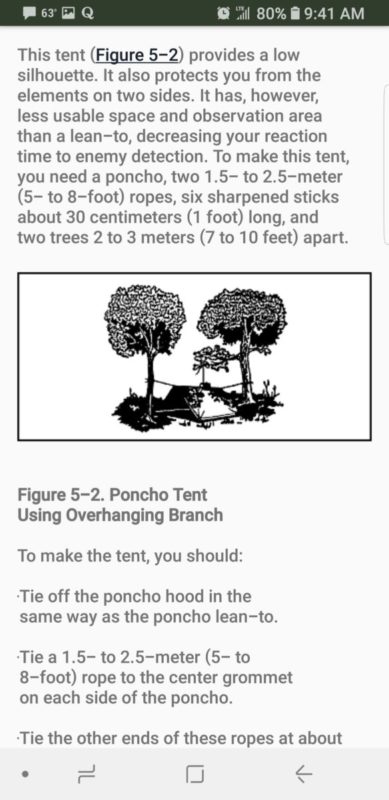
The Offline Survival Manual has everything from the psychological aspects of a survival situation to how to build a basic shelter, what to eat, and how to make a fire and find direction. Useful for dire situations but also useful for learning about nature, hiking, and camping.
Plus, it has the interesting factor; pretty entertaining to read about what to do if you get a snake bite and how to use the moon to find your way. Offline Survival Manual is one of the most useful free camping apps for Android users.
Just Plain Fun
Star Walk 2 (Android and iOS)
I always like to pretend I know what I’m talking about when I gaze up in the sky and see beautiful constellations. In reality, I have no idea. I can typically find the Big Dipper or is it the Little Dipper?
Star Walk is a great astronomy guide for exploring the night sky. And while camping in remote areas is usually the time you’ll be able to a clear starry sky.
You point your phone to the sky and it identifies planets, asteroids, comets, constellations and stars in real time.
Geocaching (Android and iOS)
Who doesn’t like treasure hunts? Geocaching is the official app for all the millions of containers hidden all over the world.
Even if you’re a newcomer to the geocache scene, the app walks you through your first finds with tips and instructions on what to do.
The app can be used to search for geocaches, submit whether or not you found a particular cache and has a LiveSearch option that continuously updates as you move.
RELATED: 39 EASY CAMPFIRE RECIPES
Pokémon Go (Android and iOS)
I have yet to jump in on this latest craze, but we see people searching for their mons all over the place. It’s what all the cool kids are doing nowadays.
The basic Pokémon Go app is free which allows you to connect with friends, send gifts, unlock bonuses and search for Pokémon. The app is free to play but offers in-game purchases.
Be careful, from what I’ve been told it can be addictive!
Additional App for Military
Allstays Camp and RV Military (Android and iOS)
Since it’s only free for active military, military veterans and government employees, we put Allstays at the bottom of the list.
This app shows every military campground and includes commercial campgrounds that are a part of the Tents for Troops program together on one map. It’s one of the best camping apps for military personnel who enjoy camping.
We like military campgrounds as they are relatively inexpensive, usually have good amenities, and due to the nature of them being on a military installation, are secure and usually have additional amenities such as commissaries, base exchanges, gas stations and nearby restaurants.
The Tents for Troops program is only for active military members and their immediate family members and allows them to enjoy a campsite for a minimum of 2 nights for free. Reservations are required and must be coordinated directly with the campground.
NOTE: Allstays also has a few paid apps for free camping that are worth the fee if you are on the road a few times a year searching for free campsites.
You Might Also Like
Do you have favorite free camping apps? Let us know in the comments below!
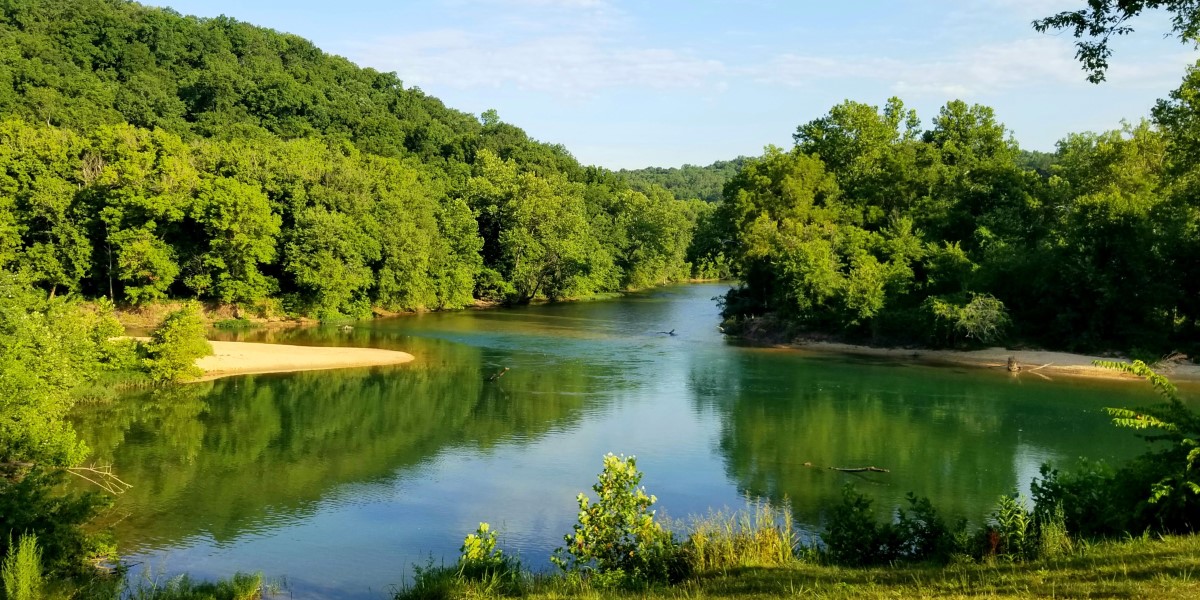
Snaking its way through rural southern Missouri, the Current River is one of the most beautiful rivers in the entire country. And as fate shall have it, another one is right next door, the Jacks Fork River. I haven’t been on every river in the United States necessarily, but I’ve visited every state and have never come across two more paddle-worthy waterways.
Together, they make up the first river system in America to be designated a national park, the Ozark National Scenic Riverways. It only takes two seconds on the water to figure out why they wanted to preserve and protect them both.
The spring-fed water is so vodka clear that I don’t think the two guys we met on our most recent canoe trip are that crazy for saying they stuck their bottles in at one of the springs and drank it. I wouldn’t recommend it, but I totally get it!
Below, you’ll find all you need to know for your Current River float trip!
What to Pack & Wear
The 184-mile river is the most spring-fed of all the Ozark rivers, so it remains a steady 58 to 63 degrees, making it a year-round destination. And the perfect getaway to escape Missouri’s suffocating summer heat.
Current River rafting rental places provide paddles, life jackets, and garbage bags. Here is what you should bring.
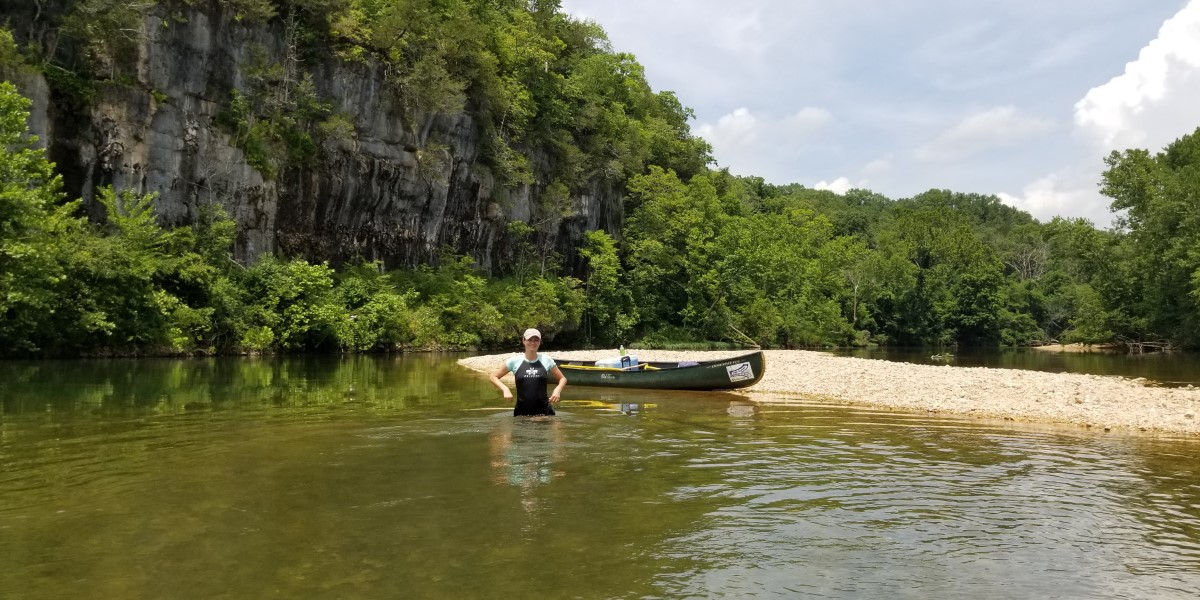
- A Cooler – If you plan to be on the water all day, bring a big enough cooler for lots of water, snacks, other drinks, and food. This Inflatable Floating Cooler Raft is perfect if you plan on going down the river in a tube. Note: Alcohol is permitted but no glass containers or styrofoam coolers are allowed.
- Bug Spray – It’s always a good idea to pack bug spray when enjoying the great outdoors.
- Sunscreen
- Hat and/or Sunglasses
- Water Shoes or Waterproof Hiking Sandals
- GoPro (we love not worrying whether or not our phone is going to get wet) or Phone with Waterproof Case.
- Dry Bag – This waterproof dry backpack is perfect for kayaking, camping, or floating.
- Binoculars if you’re into bird watching.
Tips for Your Current River Float Trip
Floating Current River is one of the most popular activities in Missouri. Be prepared with the tips below, before floating down this spectacular river.
- Check the Current River floating conditions (water levels and weather) the night before your scheduled trip.
- If you want to miss the loud, drunk college kids, float during the week or in the off-season.
- Ask the rental place about any areas you need to watch for due to high or low water. They usually have the inside scoop where people are tipping over if there’s a hotspot.
- Do not leave anything expensive in your car. Lock it up either way.
- See if you can leave your car keys with the rental place. Realizing you lost your car keys would be a horrible way to end the day.
- Clarify where the pick-up or stopping point is. Find out if there are signs or prominent features in the river to look out for.
- Apply and reapply sunscreen. It’s easy to forget how strong the sun is when swimming in that cold water!
- Download the area (click here to read how to save maps on Google Maps) with a few main points of interest saved in case you have any issues and to track how far you are throughout the day. There is limited cell service on the river.
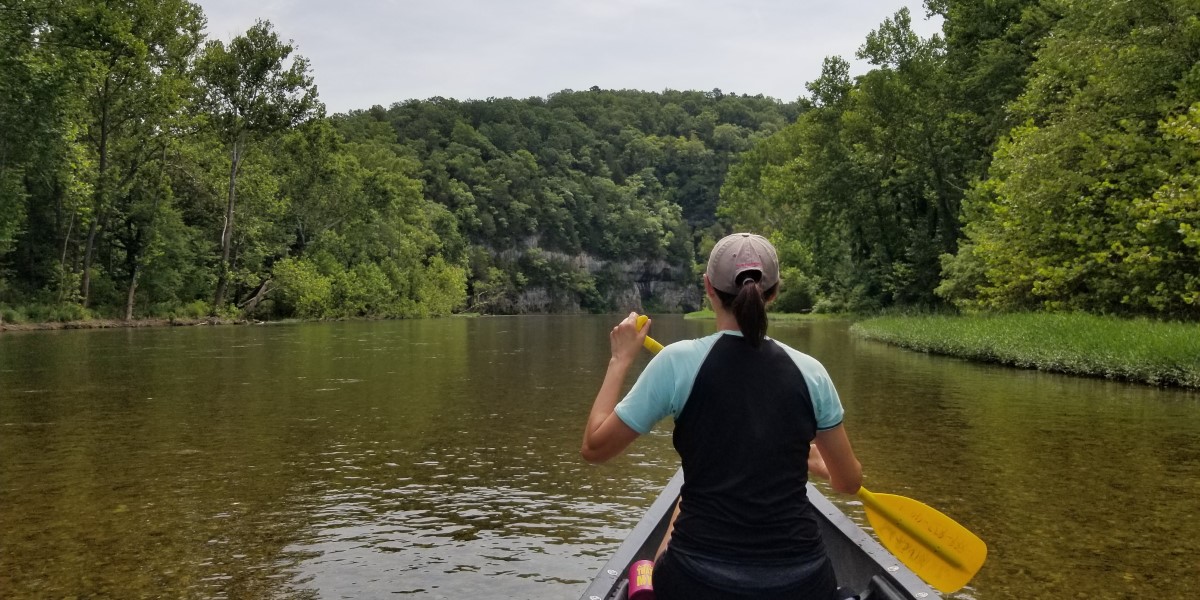
Is the Current River Difficult to Paddle?
The Current River is considered a Class I rapid. The water is mostly gentle with a few Class II spots.
It’s important to note that the river can present some challenges though. One factor that can make the Current River difficult to paddle is its fast-moving currents.
The river has a steady flow rate, so paddlers must use their skills and experience to navigate the water safely. Inexperienced paddlers may find themselves struggling against the current, particularly when trying to maneuver around obstacles such as rocks or fallen trees.
The river can also be challenging due to its rapids and riffles. These areas are characterized by rough water and sudden drops, which require careful attention from paddlers in order to avoid capsizing or getting stuck on rocks. While experienced kayakers and canoeists may enjoy the thrill of navigating through these sections, beginners should exercise caution when attempting them.
In addition, weather conditions can play a major role in how difficult the Current River is to paddle. Heavy rainfall or high winds can create choppy waters and increased currents, making it more challenging for even experienced paddlers to stay upright.
Overall, whether or not the Current River is difficult to paddle depends on numerous factors. However, with proper preparation and experience, most individuals should have no trouble enjoying this scenic river by kayak or canoe.
Best Current River Float Trips
The Current River starts at Montauk State Park in Salem, Missouri, and runs for 184 miles.
There are many sections to consider so what part of the Current River is best to float?
Here’s the thing, the Current River is amazing from all sides and angles so you really can’t go wrong with any float trip. If you are only driving down to get out on the water and don’t have time to sightsee then I suggest canoeing or kayaking the upper section.
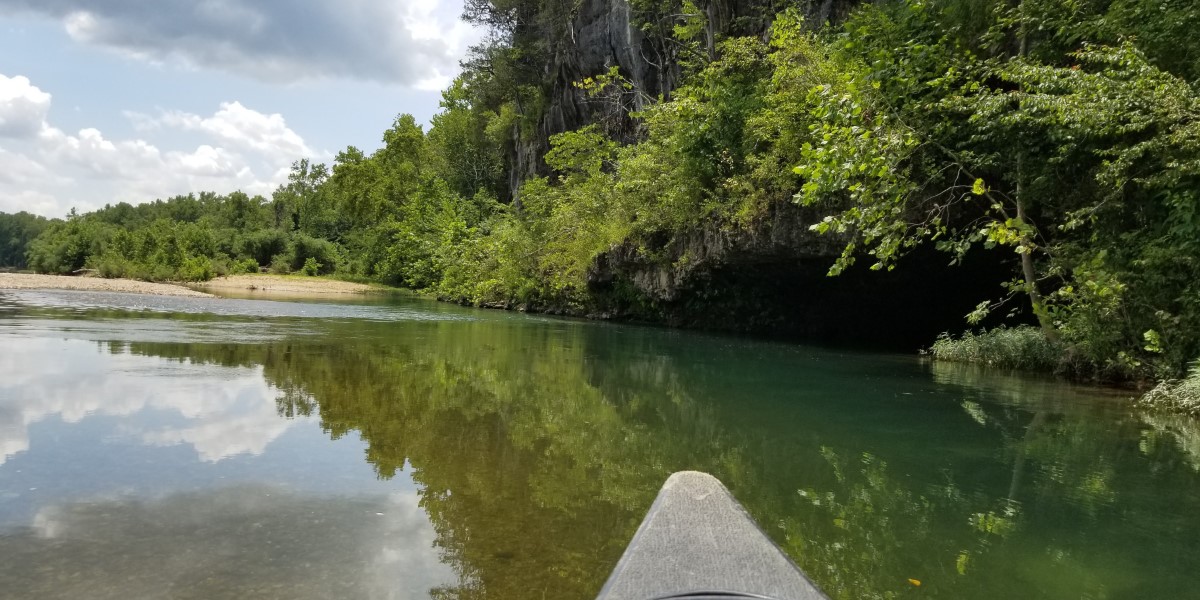
One of my favorite parts in this section is Akers Ferry to Pulltite. It’s a half-day float and halfway is Cave Spring.
It’s a unique spot because you can paddle about 150 feet inside the dark cave. You feel the temperature drop immediately when entering and it gets a little spooky as your eyes adjust.
But if you have time to make this a full-fledged getaway then I suggest the lower section so you can add additional sights in the area to your itinerary.
In that case, the Two Rivers to Blue Spring (8 miles) or Log Yard (16 miles), might be the Current River float trip for you.
How long does it take to float the Current River?
Estimated Current River Float Times
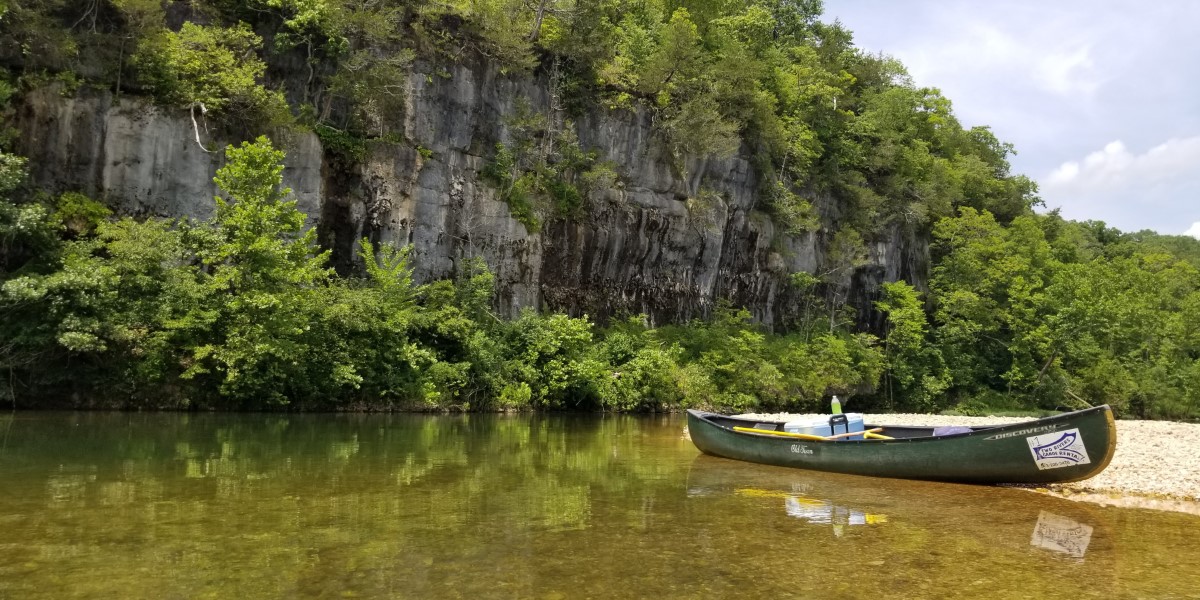
Float times can vary widely depending on water levels, what type of paddler you are, if you are tubing versus canoeing or kayaking, and how many stops and pictures you take.
Upper Current:
Baptist Camp to Cedar Grove: 8 miles, 3 – 5 hours
Cedar Grove to Akers: 8.5 miles, 3 – 5 hours
Pulltite to Round Spring: 9 miles, 4 – 5 hours
Akers Ferry to Pulltite: 10 miles, 5 – 6 hours
Akers Ferry to Round Spring: 20 miles, 6 – 8 hours
Round Spring to Two Rivers: 21 miles, 6 – 8 hours
Akers to Two Rivers: 40 miles, 14 – 16 hours
Lower Current:
Van Buren to Big Spring: 2 hours
Two Rivers to Powder Mill: 3 hours
Waymeyer to Van Buren: 3 hours
Big Spring to Cataract: 4 hours
Big Spring to Gooseneck: 6 hours
Van Buren to Gooseneck: 8 hours
Round Springs to Two Rivers (18 miles): 8-10 Hours
Powder Mill to Van Buren: 10 hours
Two Rivers to Big Spring: 14 hours
Can you tube the Current River? Yes, you can, and it’s a popular summer activity although tubing takes the longest time since you’re not paddling.
When to Go
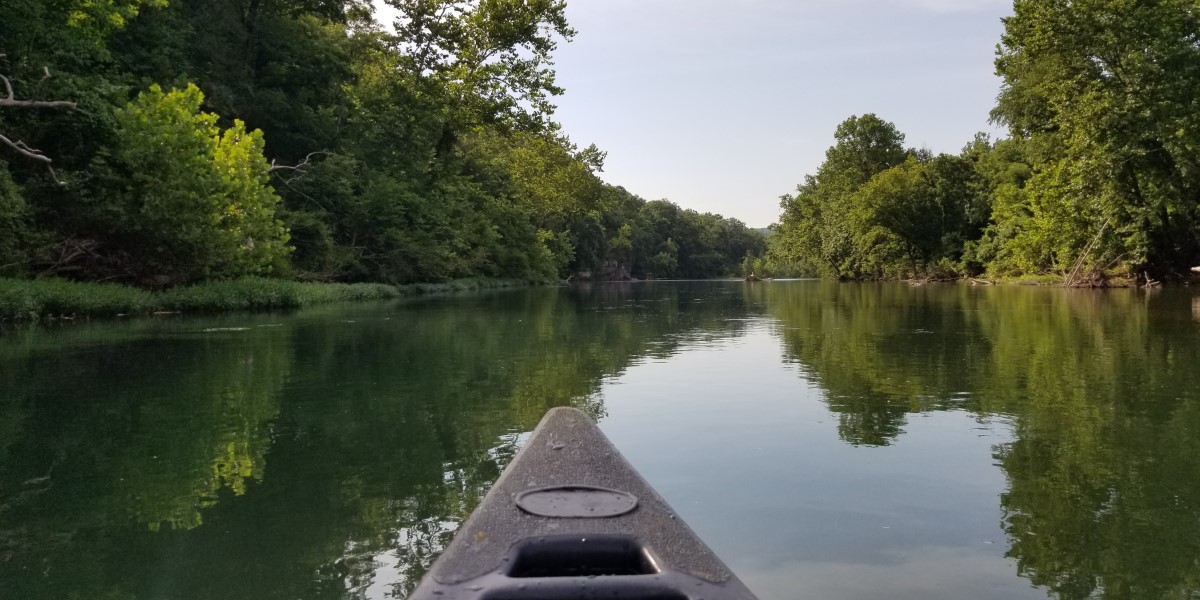
When is Current River open? The river is open year-round and free to access, but the best time to go is in the summer on a weekday.
There are many caves, springs, and pull-off sand and gravel bars to enjoy at any time of the year, but the water is so inviting that it’s nice to visit when you can also go for a swim.
Wildlife You Might See on the Current River
The Current River in Missouri is home to a diverse range of wildlife, with many species thriving in the area’s rich and varied habitats. From fish to mammals, reptiles to birds, the river supports an impressive array of creatures that call it their home.
One of the most iconic animals found on the Current River is undoubtedly the river otter. These playful creatures can often be seen swimming and playing in the water, using their webbed paws to paddle and dive beneath the surface. Otters are sensitive indicators of water quality, so their presence on the river is a good sign that it is healthy and thriving.
Another aquatic animal commonly found in the Current River is various types of fish such as smallmouth bass, rainbow trout, or channel catfish. The clear waters provide plenty of food for these species, which helps them thrive in large numbers. Anglers flock to this beautiful river every year for fishing trips that offer some great catches.
On land, visitors may encounter goats or white-tailed deer grazing along its banks or crossing through shallow areas during migration season. Wild turkey also frequent this area; they can be spotted pecking around on dry ground near trees or perching up high above riverside cliffsides.
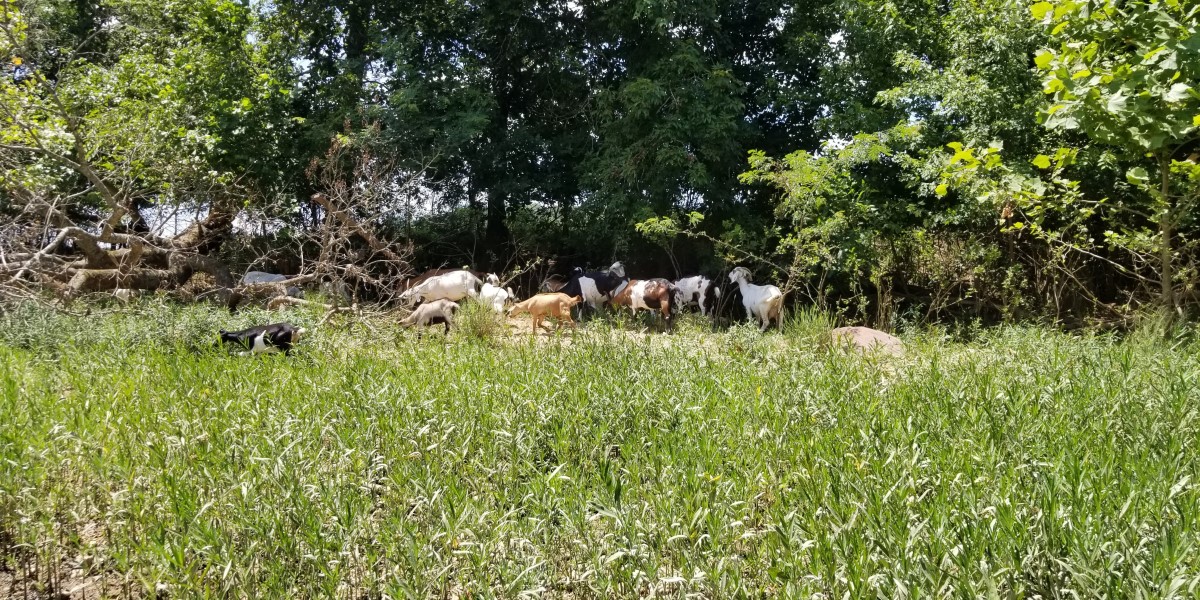
Birdwatchers will enjoy sightings of bald eagles soaring overhead while blue herons stand motionless waiting for prey at shallows’ edges. Owls come out at nightfall while woodpeckers drum sounds into surrounding trees during daylight hours.
Unfortunately, there is always a chance of snake sightings. Uh, no thanks!
But we’ve been on the river a few times over the years and have never seen one. The venomous Cottonmouths and copperheads are the ones to worry about, but I’d avoid any whether or not you think it will hurt you.
Luckily, the water is clear so you should be able to see them easily if they are wiggling around. Avoid low-hanging branches and always look where you step.
Don’t Miss These Other Noteworthy Attractions in the Area
If possible, stick around a few days to enjoy the Ozarks. There are so many other awesome things to see and do in the area. Here are a few to add to your itinerary!
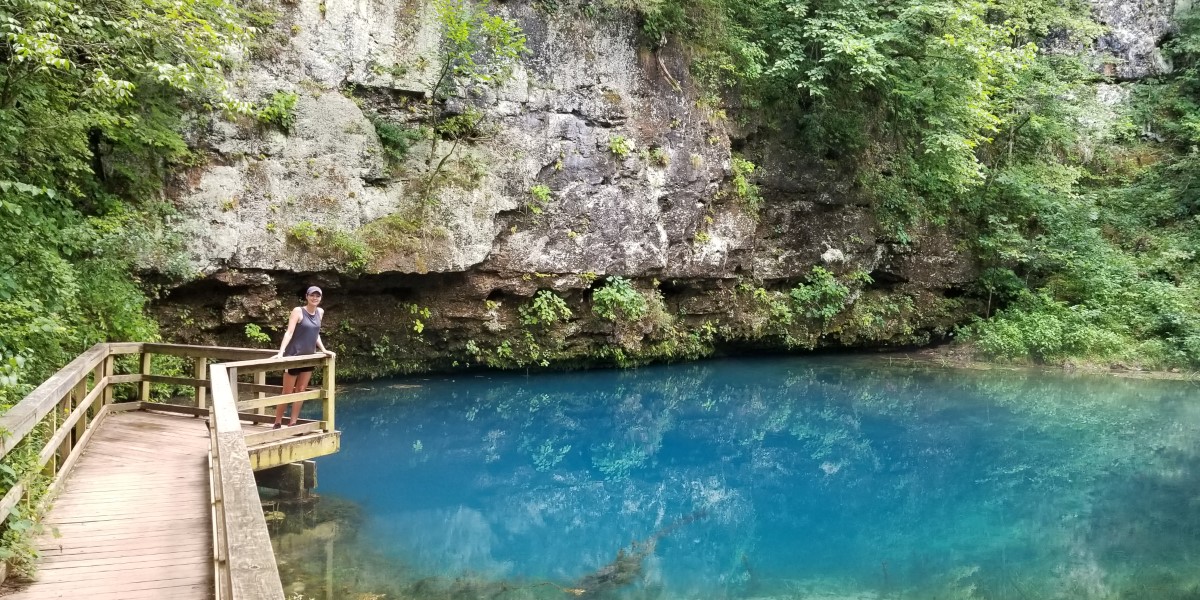
- Big Spring is one of the largest springs in the world with an average daily discharge of 276 million gallons.
Stewart’s Landing is a cozy old west town with specialty shops that sell handmade jewelry, boots, crafts, and souvenirs. - Round Spring, named for its shape, is a 55-foot deep sinkhole that gushes 26,000,000 gallons of water a day.
- Alley Spring Grist Mill Historic Site has an over 100-year-old red grist mill on-site that is not only picturesque but historic as well.
- Current River State Park and Echo Bluffs State Park have a few hiking trails, lakes, and picnic sites.
- Blue Spring is another gorgeous spring that has the most vivid blue color.
- Rocky Falls is a cascading waterfall with a large pool of water to swim in at the base.
Current River Canoe Rental Places
There are many Current River outfitters that offer day trips for floating Current River in Missouri. Here are the best places to rent tubes, canoes, kayaks, and rafts to make your trip down the river unforgettable.

Upper River:
Carr’s Canoe Rental
Silver Arrow Canoe Rental
Aker’s Ferry Canoe Rental
Current River Canoe Rental
Jadwin Canoe Rental
Lower:
Windy’s Canoes
Harvey’s Alley Spring Canoe Rental
Two Rivers Canoe Rental
Current River Float Trip Lodging
Once you start doing research, you’ll figure out there are not many chain hotels or motels in the area. The privately owned places do not pop up on third-party websites and you’ll have to call for reservations.
The Landing Current River
River’s Edge Resort
Shady Lane Cabins & Motel
Round Spring Lodge
Current River Camping Options with Flush Toilets & Showers
Jacks Fork Campground
Eminence Camp
Big Spring Campground
Alley Spring Campground
Round Spring Campground
Two Rivers Campground
Rustic Current River Camping Options
Pulltite Campground
Akers Campground
If floating the Current River was not on your travel bucket list before, we sure hope it is now!
Other Missouri Trips to Consider:
Explore Mark Twain’s Hometown
Must-See Route 66 Attractions in Missouri
An Awesome Family Trip to Branson
A Very Cool Missouri River Town that Even Has a Casino
Other Popular Missouri Float Trips:
Current River Overnight Float Trip
Black River Float Trip
Meramec River Float Trip
Eleven Point River Float Trip
Big Piney River Float Trip
Have you been on a Current River float trip before? Share your experience with us below!
Did you know the Amazon of Ecuador covers one-third of the entire country? And it offers a budget-friendly alternative to the crowded, touristy jungles found in other countries.
Since the rainforest has been high on my travel wish list since I was a kid, I was determined to fit it into our South America adventure.
I’m so glad we made it happen. It was one of the most memorable experiences of our entire three-month trip so I highly encourage you to add this wonderful destination to your itinerary!
We spent seven weeks in Ecuador, another helpful article to read next is
Important Tips and Things to Do BEFORE Arriving in Ecuador.
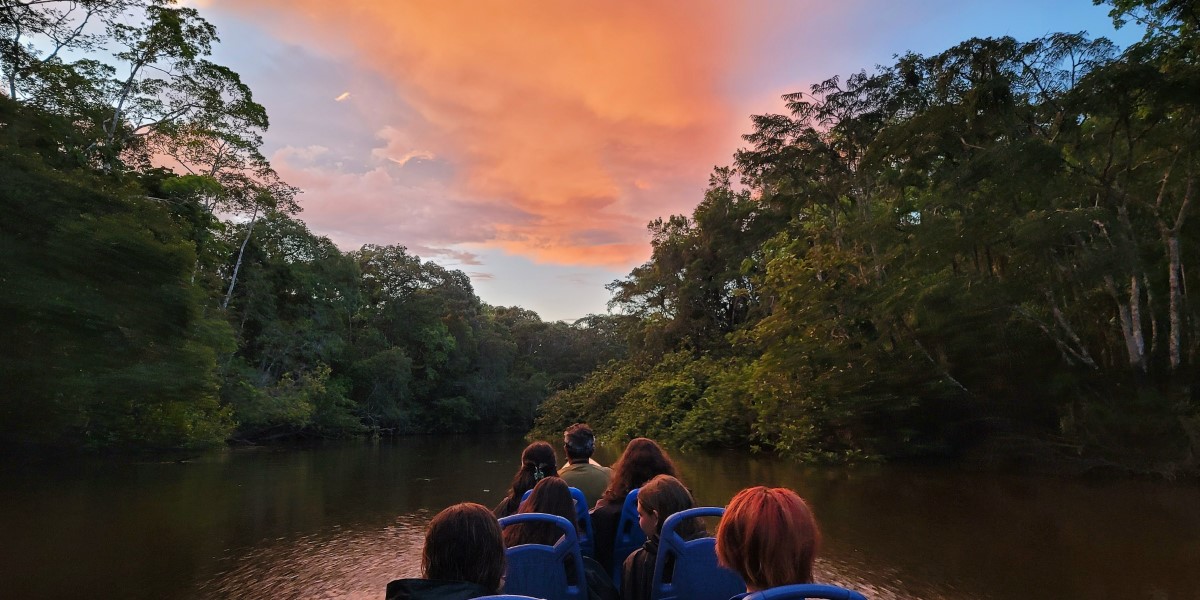
Below you’ll find all the essential things you need to know to help you visit the Amazon in Ecuador including the budget-friendly tour we took, the best time to visit, and what to pack.
Amazon Ecuador Weather
Be prepared for muggy warm air no matter what month you plan your trip. The Ecuador Amazon is hot and humid all year long with an average humidity between 85% and 95%.
Since you’ll be near the equator there is little fluctuation in the temperature. It hovers around 82° Fahrenheit (28° C) throughout the year, but we saw mid-90s in October on our expedition.
I hate the heat so I was worried it would be unbearable, but you get used to it. The guides do a fantastic job of heading out early, breaking midday, and then getting back out on the boat in the late afternoon/early evening.
Check out my packing list below to help make the days more comfortable.
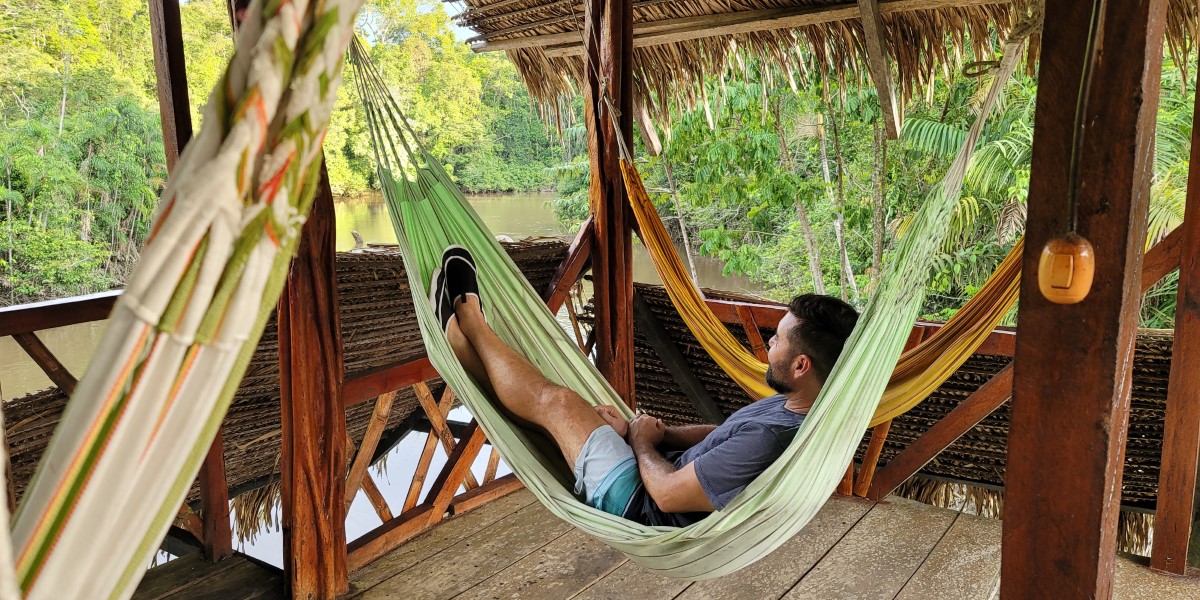
So when is the best time to visit the Amazon of Ecuador? The best time to visit the Amazon in Ecuador is either in the rainy season (March through July) or the shoulder season (August through October), avoiding the dry months of November through February.
It sounds counterintuitive to plan a visit to a place during the rainy season, but I’ll tell you why.
In the Amazon, the rain will be a welcoming break from the oppressive heat. Plus, you’ll get higher water levels which makes it easier to navigate to harder-to-get places. It also produces lush green vegetation and blooming flowers.
It really should be called the rainier season, because it is the rainforest after all; there’s rain every month.
But in the dry season, there is less of it causing low water levels and a possibility of certain activities being canceled or boat rides being extended – and not in a good way.
Don’t leave home without a Best-Selling Ecuador Guide
Ecuador Amazon Animals
With its diverse collection of wildlife, the Ecuadorian Amazon is an animal lover’s dream!
The jungle is home to over 1,600 species of birds, 800 species of fish, 350 species of reptiles, and 300 species of mammals.

We were fortunate to see so many of them on our tour including both the gray and pink river dolphins, squirrel monkeys, toucans, a sloth, woolly monkeys, caimans, kingfishers, tiger herons, saki monkeys, red-tailed falcons, otters, red howler monkeys, wolf spiders, macaws, tree bats, anacondas, a boa constrictor, tarantulas, and parakeets.
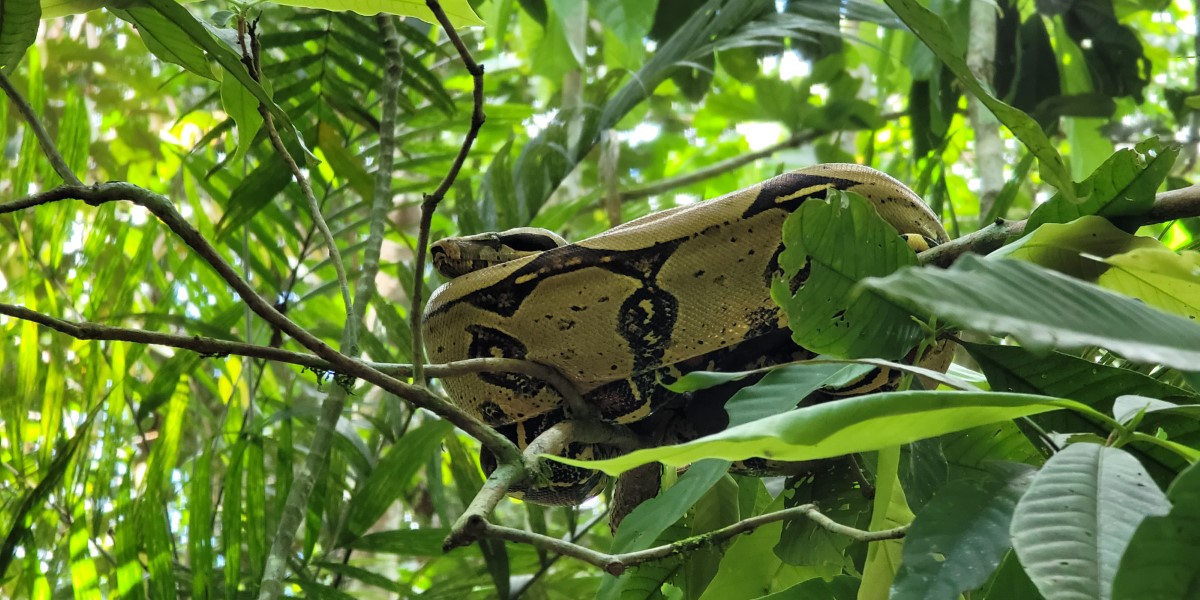
And those are only the ones we jotted down! I’m sure I am missing a few on this list.
Some of the other amazing creatures you may observe during your Ecuador Amazon experience include tapirs, jaguars, piranhas, and poison dart frogs.
How to Get to the Ecuador Amazon Lodges
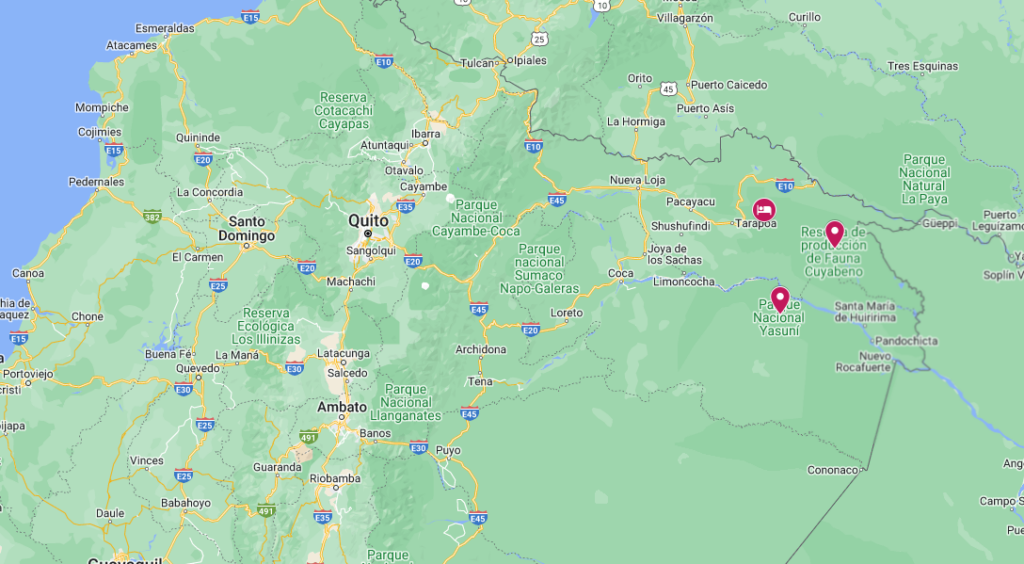
While in Ecuador, you can visit the Amazon at Yasuni National Park or Cuyabeno Wildlife Reserve.
Both are very remote areas and take a considerable amount of time to get to. You can arrive by bus, private vehicle, or by plane.
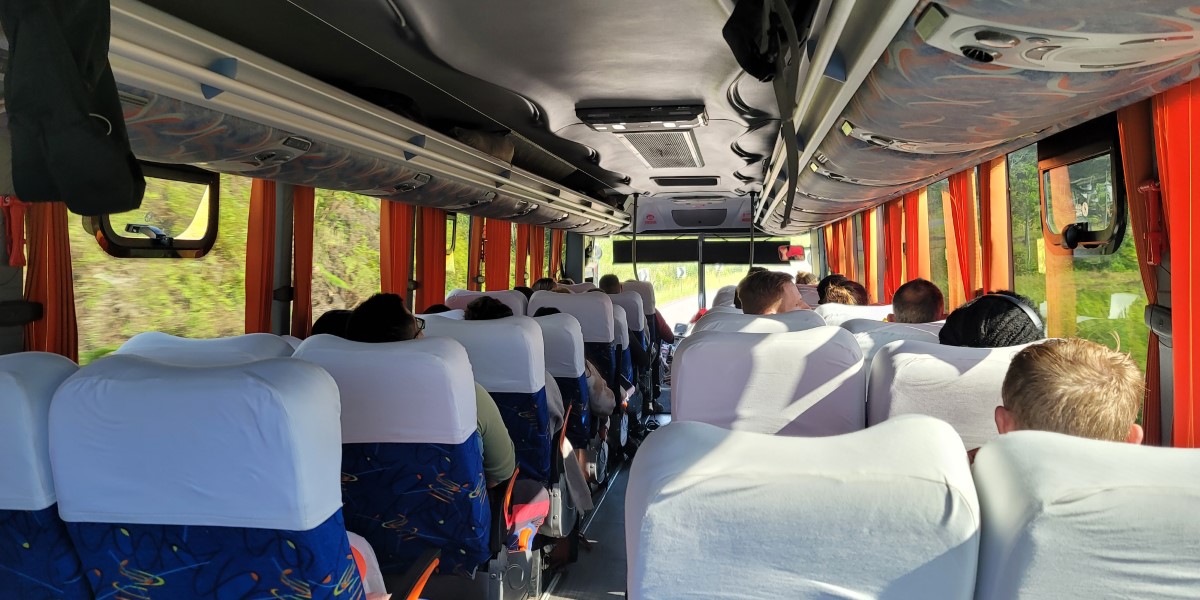
The cheapest option is by bus, but the drive is 11 to 12 hours from Quito (don’t miss my Best Things to Do in Quito post to help plan your time in the city) and is done overnight. We chose this option to save money, but if you are short on time and have the extra to spend, I recommend flying as the ride is long and the bus is cramped.
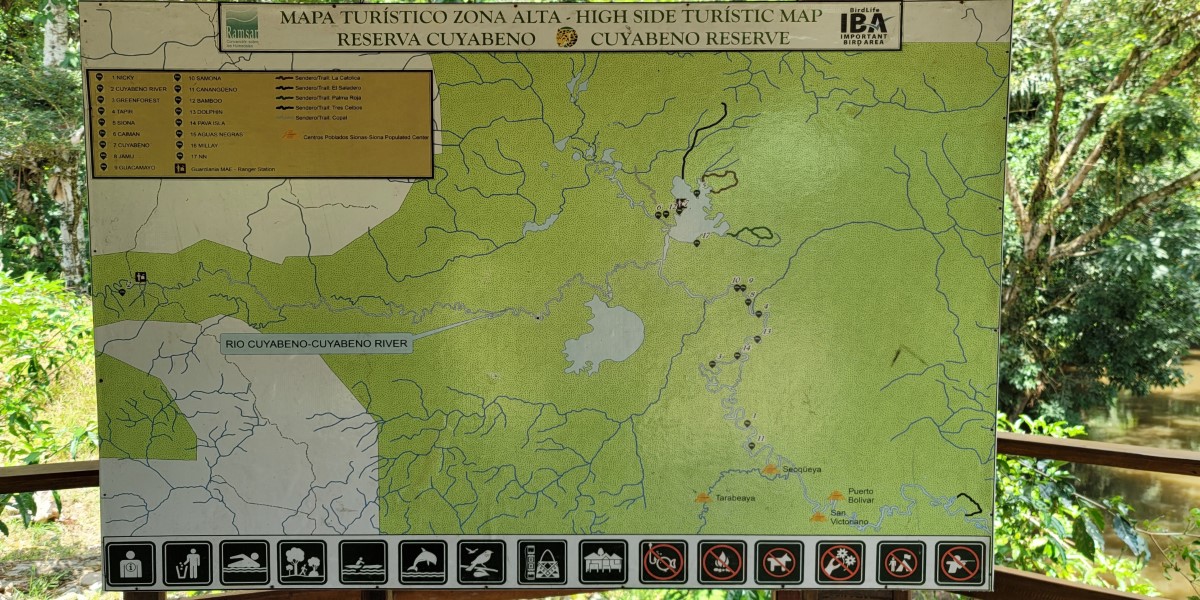
Click the Ecuador Amazon Rainforest map below to open Google Maps.
Ecuador Amazon Tour Itinerary
We chose the Cuyabeno Jungle Tour through Community Adventures.
The magnificent Cuyabeno Reserve is in the heart of the Amazon rainforest and cheaper to visit than Yasuni. The protected area is a biodiverse wonderland with over 2,300 square miles of lush tropical forest, winding rivers, and beautiful lagoons. It is an incredible experience to immerse yourself in one of the world’s most pristine ecosystems.
We thoroughly enjoyed every minute of our time in the jungle and will hold those unforgettable memories close to our hearts for a lifetime.
4-Day Cuyabeno Jungle: What to Expect
The overnight bus ride from Quito is roughly eleven hours. Since there are no bathrooms on the bus, we took two bathroom breaks.
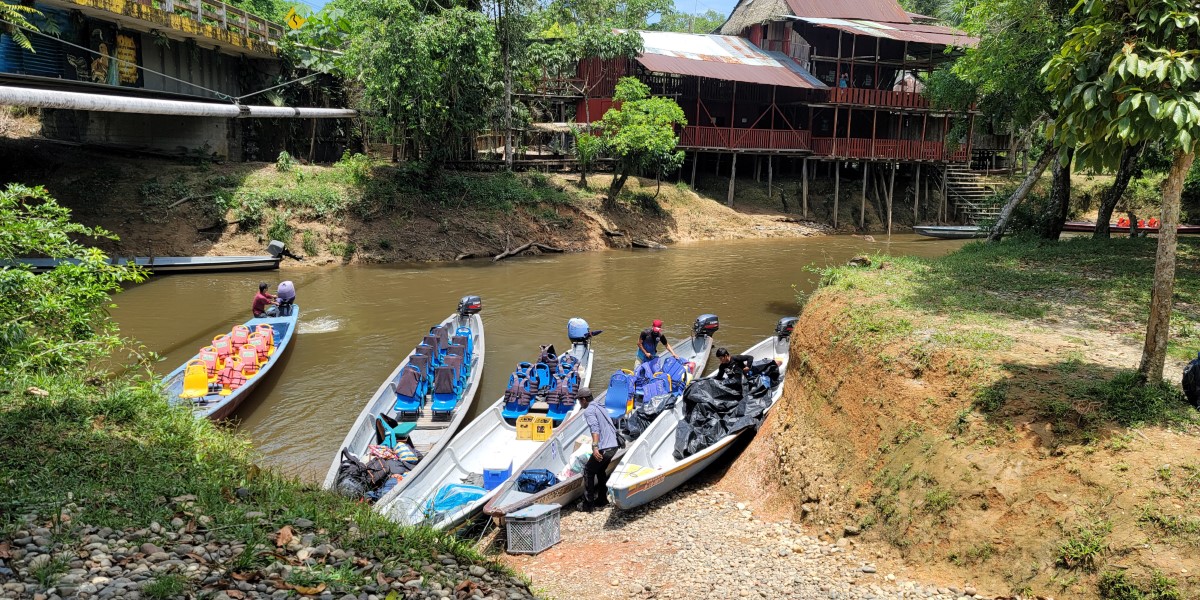
Once we arrived in Lago Agrio in the morning, the guides separated us by which lodge we were staying at. We then hopped in a small boat with our group and rode roughly two hours through the Amazon jungle to the Dolphin Lodge.
I’m not going to lie, the overnight bus ride and then all-day exploring in the heat is a bit overwhelming, but the excitement of being in the Amazon outweighs the exhaustion.
Day 1
Welcome to the wild side of Ecuador, where you’ll find out immediately that the lush green jungle reigns supreme and the wildlife runs free.
From the first moment, we began our float on the river, there were all sorts of animal sightings. Before we arrived at the lodge, we had seen more monkeys and birds than I thought we’d see the whole trip!
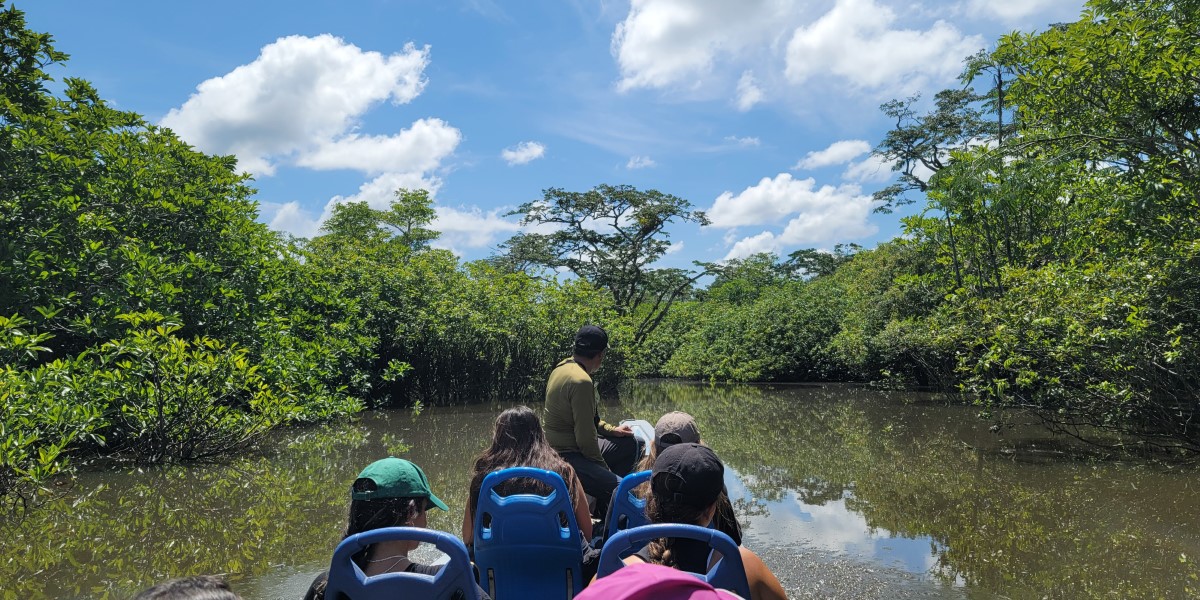
The two-hour canoe ride took a little longer since we stopped to take pictures. Our guide, also a biologist, did a fantastic job welcoming and introducing us to this remote corner of Ecuador.
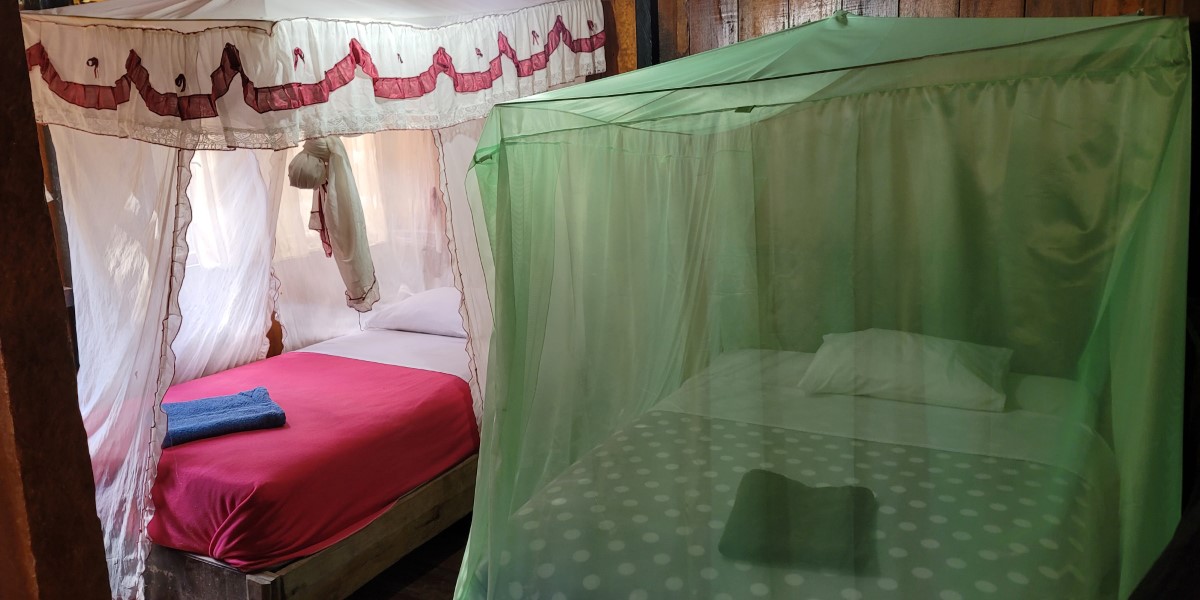
Once we arrived at the Dolphin Lodge, we were taken to our rooms to settle in and clean up for a late lunch.
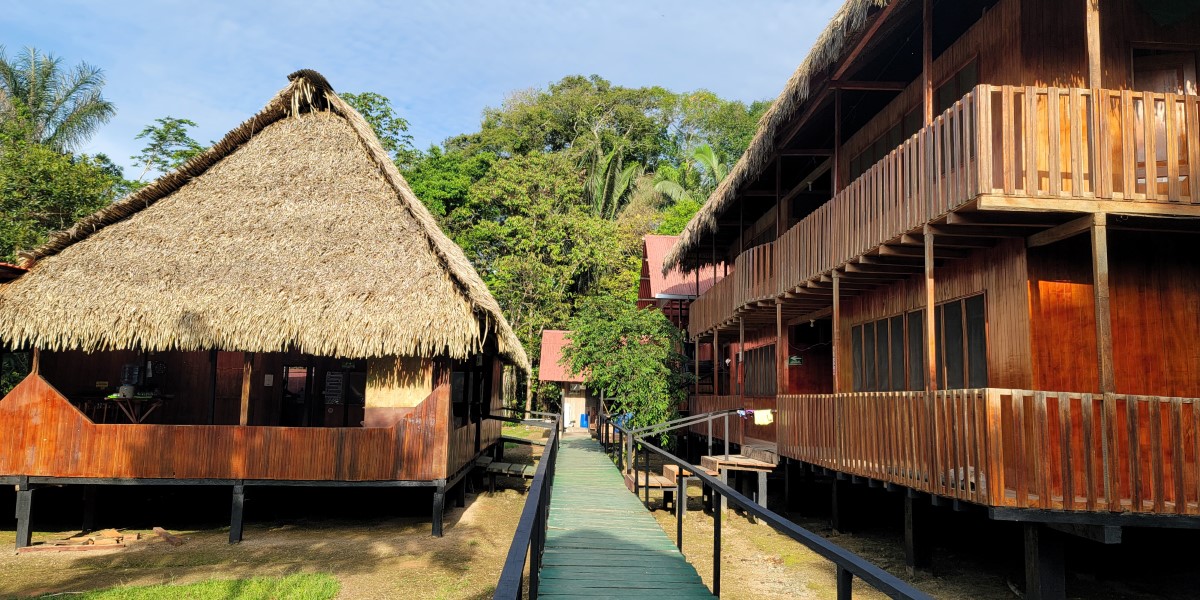
Meals are served communal style at a big long table. It’s a guaranteed way to get to know your fellow travelers.
In our group, we had one woman from Canada, a couple from the US but currently living in Ecuador, and a group of four Israeli girls who just got out of the military and were taking a sabbatical before university.
Even though everyone was exhausted from the long travel day, we were all chitchatting about where we were from and what we had done in the country before arriving in the Amazon.
After dinner, we relaxed a bit before heading out again on the boat to catch the sunset at Laguna Grande (the big lagoon) and for night swimming.
On our way, we saw the first big snake of the trip. It was big and black and coiled around a branch hanging over the river. Not something you necessarily want to see before jumping in!
Although our guide, Jose, assured us we were not in any danger as we all discussed how creepy it was swimming in water where we know spooky creatures frequent.
All our jitters disappeared though when we saw our guide let his 10-year-old daughter jump in. We figured he wasn’t lying then! That or he was paying a child actor to convince us it was all good.
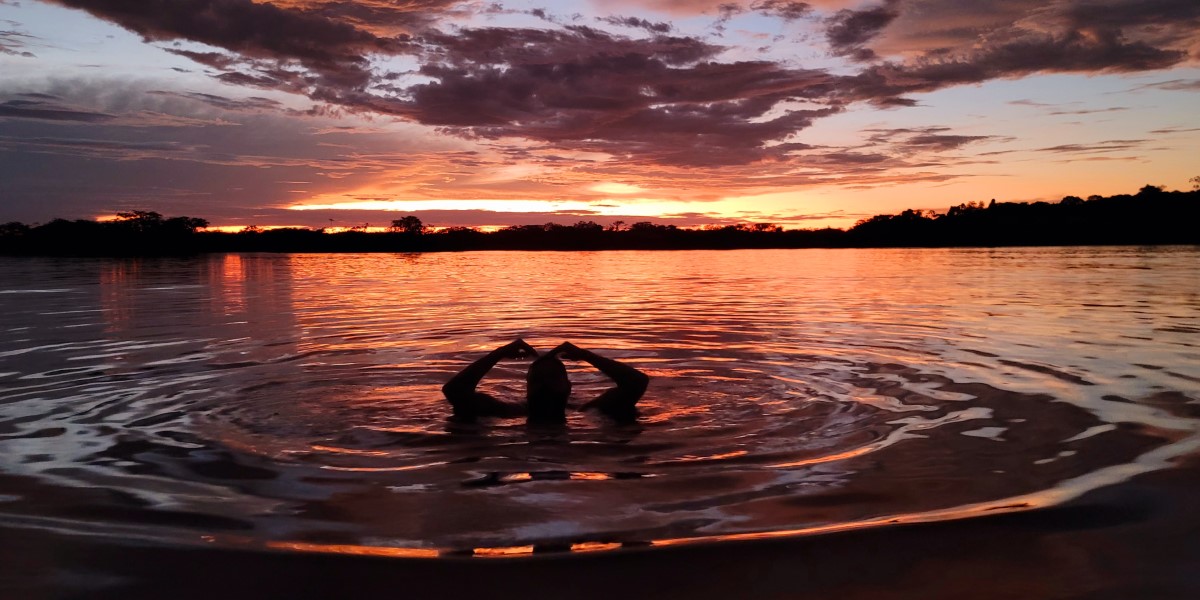
Day 2
Our second day began with a simple breakfast. Most of the food prepared is simple and easy to digest as all provisions are carried in and also the guides do not want anyone to have any stomach issues while out exploring all day.
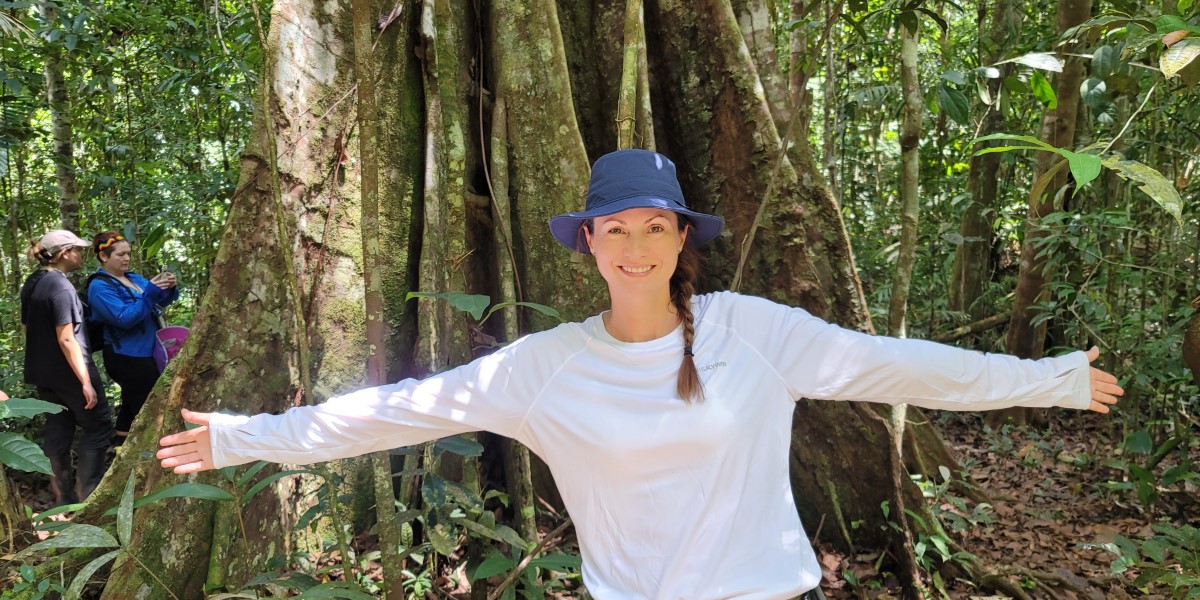
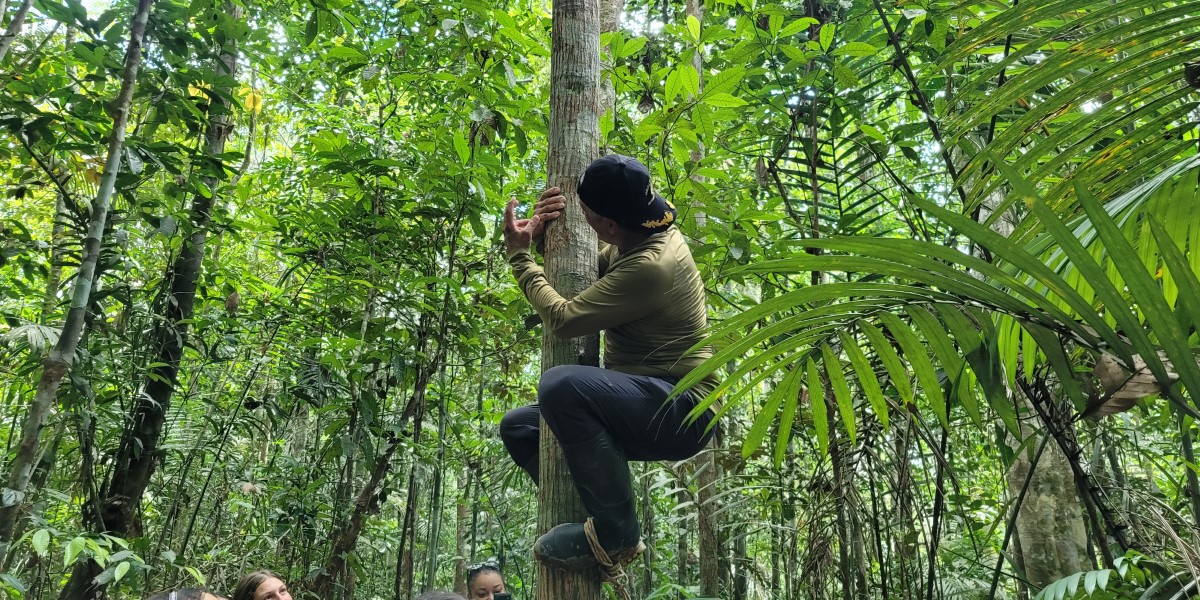
After breakfast, we went for a morning boat ride and hike in the Sendero Palma Roja (Red Palm Trail). On the hike, we learned all about the forest including how to climb trees, find bark with medicinal value for stomach aches, flora and fauna types, and survival techniques.
We also had an interesting sighting as one of the girls luckily looked up and spotted a boa constrictor (pictured above in the animal section) curled up on a branch.
On the way back for lunch, we didn’t have a dull moment. First, we saw a few otters playing in the river, then we came across a sloth while observing various birds like toucans kingfishers, and macaws, and finally, a few gray river dolphins appeared for quite the show.
Late afternoon, we moved out again for a relaxing bird-watching experience. We saw many exotic species at Caimancocha and Patococha with the surprise appearance of a few saki monkeys.
We enjoyed another spectacular sunset while swimming in the lagoon. Once the darkness set in, we were able to observe an explosion of bright stars, the planet Jupiter and could even see the Milky Way since it was such a clear night.
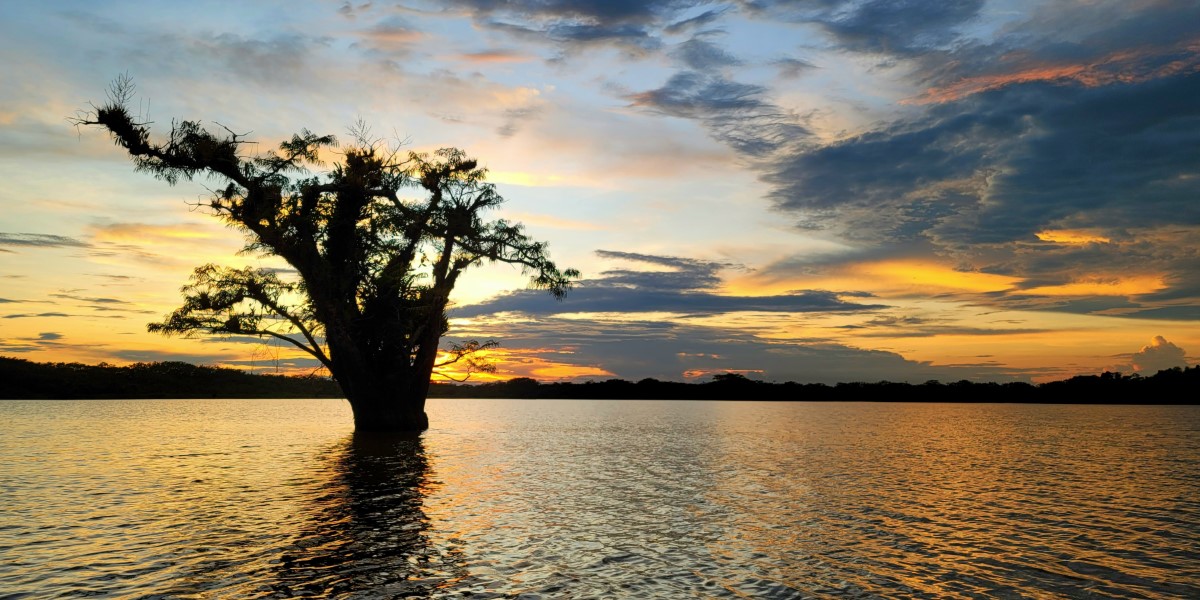
On the way back to the lodge, we spent some time on the river in the dark with our flashlights searching for caiman.
Make sure to pack a strong light for the trip because you will not be able to see their eyes glowing unless you are the one holding the flashlight. We found a few small ones and a big one that Jose managed to get right up on!
The day ended with a fabulous meal and a few beers before turning in for the night.
Day 3
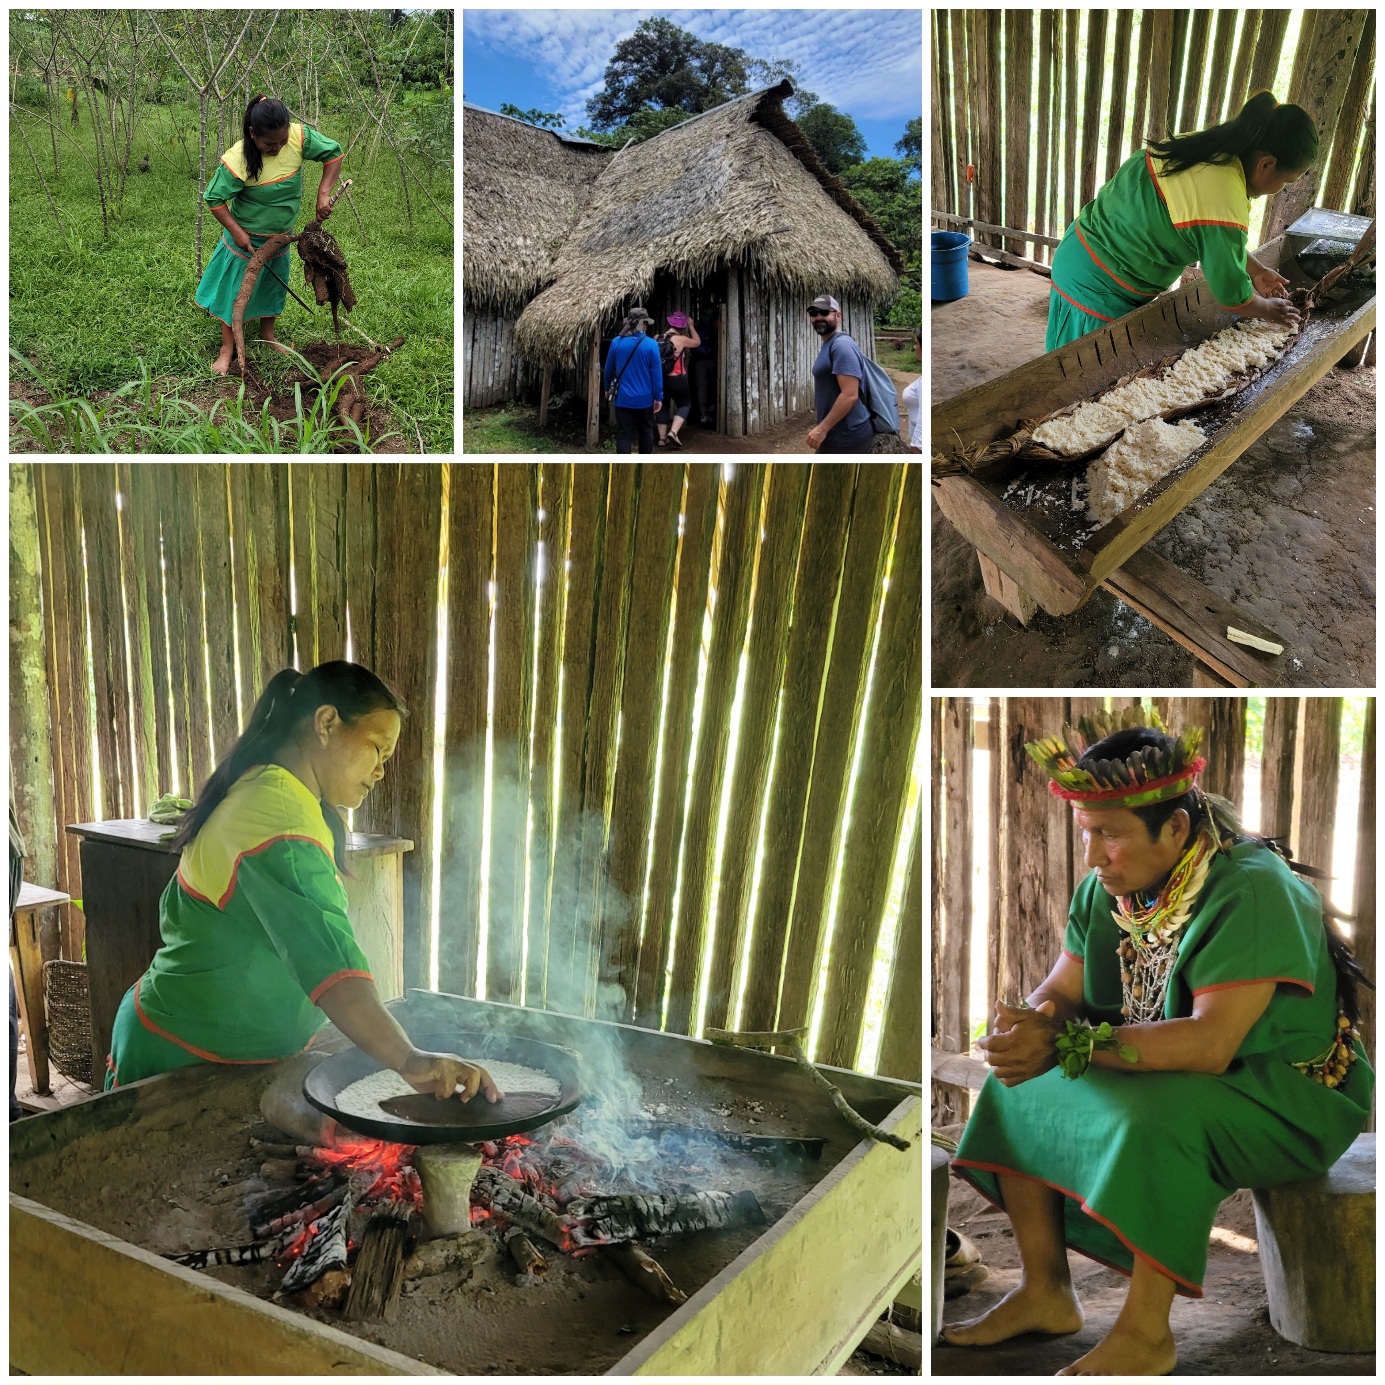
Day three was all about experiencing some local flair at one of the well-known indigenous tribes on the river, the Siona community. There we learned all about their local customs and traditions unique to living off the grid.
We picked yuca, a root vegetable, from the garden and then helped make bread with it. Afterward, we met with the shaman to discover his mysterious techniques for working with nature and the spirits.
Even though every day in the Amazon was special, this day really stood out as an extraordinary escapade!

The morning of our final day, we all had the option to go bird-watching one more time before breakfast. Everyone from our group chose to get up a little earlier to take advantage of the last few hours.
On our final journey back up the Cuyabeno River, we were all ecstatic to see a large anaconda snuggled on a branch sending us off with a dramatic farewell. What a way to end our time in the jungle!

Wondering what to wear in the Amazon rainforest? We’ll make it easy for you, see below for a checklist of items to pack!
Clothes
- Lightweight, quick-dry long pants (even though it’s warm I wouldn’t suggest wearing shorts because of bugs and hiking at night). See men’s hiking pants here.
- 4 Breathable Long Sleeve Light-Colored Shirts (that can roll up for short sleeves as well). See men’s breathable shirts here.
- Leggings – Because these are always a good idea for lounging around. Or lounge shorts for men.
- Short Pajama Set (I was worried about mosquitos at night, but with the netting and permethrin we had no issues and I really wished I brought shorts because it was so hot)
- Sandals
- Sporty Swimsuit (I say sporty because you’ll be climbing in and out of the boat without a ladder)
- Long socks for rubber boots
- 4 Pairs of Comfy Underwear
- Sports Bra
Medications
- Malaria Pills. Even though we did not come across many mosquitos and there are no major outbreaks of malaria in Ecuador right now, we feel it is better to be safe than sorry.
- Sudafed – We came from the mountains so my sinuses really acted up the first two days once we got back to lower ground.
- Electrolyte Packets – It’s extremely hot and humid so having a few of these helped stay hydrated.
Other Items
- Permethrin – It lasts up to six weeks or through six washings and works for bed bugs too so we sprayed our Amazon clothes and backpack before we left for our trip.
- Portable Charger (being out for hours at a time, I loved having an extra charge
- Dry bag with Shoulder Straps (to use as a day bag)
- Refillable Water Bottle
- Breakfast for the first morning & snacks for the bus ride
- Sunscreen & Lip Balm
- Foldable & Breathable Hat with a wide brim
- Quick Dry Towel
- Flashlight
- Bug Spray
- Sunglasses
- Earplugs
- A dry bag for dirty or wet clothes
- Binoculars
- GoPro and/or Camera
- Kindle – you’ll have a decent amount of downtime and it’s nice not to have to burn the battery of your phone.
- Cash for tips
A helpful tip is to stay at a hostel the night before (we chose to stay at Community Hostel where our tour departs from) so you can leave your big backpack or luggage in their storage room and bring only what you need for the few days. Most hotels will do this as well.
The boats that take you in and out of the lodge are small so it is helpful for the guides to bring only what you need for those few days.
Also, make sure to line your bag with a garbage bag or something waterproof since it tends to rain often.
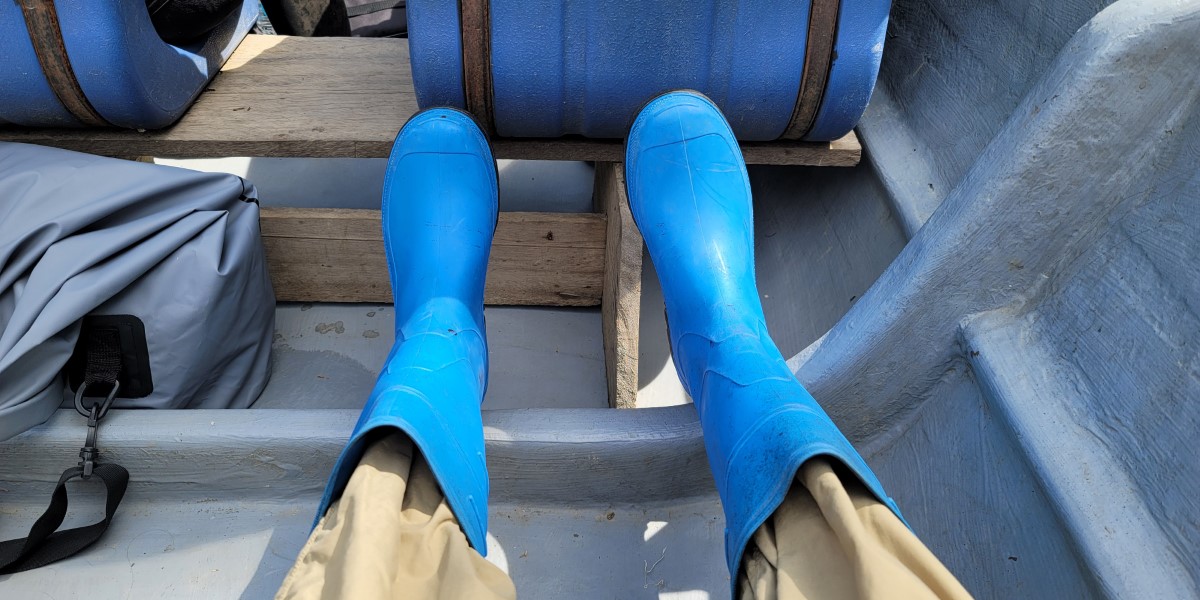
If you do not book the same tour as us, make sure to confirm whether or not waterproof ponchos and boots are provided. You will definitely need them at some point!
Many of the lodges have no air conditioning or electricity in the rooms. They will, however, have one area in the common space to plug your electronics in.
5 Interesting Ecuador Amazon Rainforest Facts
- The Amazon spans eight countries: Ecuador, Peru, Brazil, Bolivia, Colombia, Venezuela, Guyana, and Suriname.
- Even though the Amazon represents one-third of Ecuador, it is only 2% of the entire Amazon Basin.
- A Spaniard, Francisco de Orellano, was the first European to discover and explore the Ecuadorian Amazon in 1541. He named it after the female warrior tribes in Greek mythology.
- There are an incredible number of species of trees in the forest, making it the highest in any region of the world.
- There is a lot of crude oil under Ecuador’s Amazon and it is a constant struggle to keep the jungle secure from drilling and oil extraction. As of 2023, the debt-riddled government wants to tap into the reserves more than it already has.
Frequently Asked Questions
Is there yellow fever, dengue, or malaria in the Ecuadorian Amazon? Yellow fever: There is a risk of yellow fever in South America, but the risk is low in the Ecuadorian Amazon. There is a risk of Dengue Fever and Malaria, both contracted through the bite of infected mosquitoes, in Ecuador’s Amazon. It is recommended to wear bug spray and long sleeves, and pants while in the rainforest.
It’s best to see a travel doctor before your visit
Do you need a yellow fever vaccine to visit the Amazon in Ecuador? No, it is not required to have a yellow fever vaccine to visit the country of Ecuador or the Amazon Rainforest in Ecuador.
Is it safe to drink the water in the Amazon in Ecuador? No, it is not safe to drink water in the Ecuadorian Amazon. Your lodge will provide you with potable drinking water.
Are there mosquitos in the Cuyabeno Reserve? The only time we saw mosquitos was right at sunset and about twenty minutes after. Otherwise, we were pleasantly surprised not to have that many buzzing around.
Disclaimer: This post may contain affiliate links, if you book through our link we will receive a small commission at no additional cost to you. Thanks for helping to support the blog!
After spending two months wandering around New England, I am organizing must-see and must-do things in the six states. And high on my list includes the best tours of Newport mansions in Rhode Island to visit because walking around these lavish and overindulgent estates is definitely an experience you should not miss.
Originally, we planned on only visiting one or two mansions. However, after analyzing the Newport Mansions ticket prices, descriptions, and discounts, we ended up touring five on the inside and a few on the outside. As much as I cannot fathom growing up in these living museums during the Gilded Age, I am so thankful they have been preserved for us to masquerade in their world for a day or two.
If you’re planning an adventure in the northeast, here are some other articles to help with your trip:
An Incredible New England Itinerary
Connecticut Bucket List Destinations
Block Island, a Magical Oasis in Rhode Island

Who Owned the Newport Mansions
The rich and famous, that’s who!
Ah yes, the Gilded Age. A time in America when new wealth accumulated from generation to generation creating an era of exuberant extravagance. We are talking opulent “cottages” that could fit an entire small town inside. Yet they were built for one family to be used six weeks out of the year. Elaborate wild parties that lasted for days with intricate planning and grandiose theatrics.
Cue The Great Gatsby scenes in your mind.
“I was within and without, simultaneously enchanted and repelled by the inexhaustible variety of life.” ― F. Scott Fitzgerald
Today, you can visit ten restored mansions that are run by the Preservation Society of Newport County, Rhode Island’s largest cultural organization.
“Its historic properties and landscapes – seven of which are National Historic Landmarks – trace America’s architectural and social development from the Colonial era through the Gilded Age. In keeping with its mission, the Society strives to offer its members and the public a comprehensive view of each property’s architecture, interiors, landscapes and social history.”
Find Out About the Man Who Coined the Term “Gilded Age”

Best Newport Mansions to Tour and What Tickets to Get
The biggest question we had in planning our visit was what tours of Newport mansions to choose from and if it was possible to see them all in one day.
All things considered, the best bang for your buck is the 5-House Ticket because you get to see the best homes and the tickets do not expire.
If you are not able to see all five in one visit, save your tickets for a future trip.
The list of Newport mansions you can tour includes:
- The Breakers – A Vanderbilt summer
homepalace with 70 rooms and 4 floors, the biggest and most grandiose of the mansions. - Marble House – Another Vanderbilt mansion built in the late 1800s with 50 remarkable areas such as the Gothic room and the grand staircase made of Siena marble.
- Rosecliff – Hear about and imagine the excessive parties that took place at this historic house and see the grand ballroom used in the movie, The Great Gatsby.
- The Elms – Experience a romantic ambiance with French influences and one of the most beautiful grounds and gardens of Newport.
- Chateau-sur-Mer – Highfaluting Victorian masterpiece with an impressive grand hall.
- Chepstow – An Italian-style villa adorned with original furnishings and 19th-century American artwork.
- Hunter House – Built in 1748 for a sea merchant, it is a fine option if you enjoy Georgian Colonial architecture.
- Green Animals Topiary Garden – A country estate with green animal-shaped shrubs dotting the landscape.
- Isaac Bell House – One of the less crowded mansions known for its Shingle Style architecture and a mix of European, Japanese, and American décor.
- Kingscote – A Gothic Revival home built by cotton plantation owners with original Tiffany glass bricks in the dining room.
After much debate and research, we chose the first five in bold on the above list. They are the most awe-inspiring and over-the-top mansions and offer a wide variety of architecture and history.
If you only have time to tour one or two of the Newport mansions, I would highly recommend The Breakers and the Marble House. Unfortunately, the Breakers is the busiest, but it is a one-of-a-kind experience.
READ NEXT: AMAZING THINGS TO DO ON BLOCK ISLAND

Newport Mansions Ticket Prices
Newport mansions tickets can be purchased online or at any Newport Mansion.
- Breakers Only: Adult $29, Child $10
- 1 House Ticket: Adult $25, Child $10
- 2 House Ticket: Adult $38, Child $14
- 3 House Ticket: Adult $46, Child $16
- 5 House Ticket: Adult $60, Child $20
- Student One Year Membership: $35 – Includes unlimited access to regular tours for one year.
Which Newport Mansions are Open?
Always check online as the open mansions change periodically based on the time of year.
The 2023 schedule is as follows.
April 1 – April 29: The Breakers, Elms, Marble House, and beginning April 15th, the Green Animals Topiary Garden.
April 30 – May 29: The Breakers, Elms, Marble House, Green Animals Topiary Garden, and Isaac Bell House.
May 30 – July 30: The Breakers, Elms, Marble House, Green Animals Topiary Garden, Hunter House, and Kingscote.
July 31 – August 31: The Breakers, Elms, Marble House, Green Animals Topiary Garden, Chateau sur Mer, Chepstow.
September 1 – October 1: The Breakers, Elms, Marble House, Green Animals Topiary Garden, Chateau sur Mer, Rosecliff, and The Breakers Stable and Carriage House.
October 2 – October 29: The Breakers, Elms, Marble House, Green Animals Topiary Garden, and Rosecliff.
October 30 – November 17: The Breakers and Rosecliff.
November 18 – January 1, 2024 (Holidays at The Newport Mansions): The Breakers, Elms, Marble House, and Rosecliff.
Military Discount on Memberships
Attention military folks: any active, reserve, or retired military with a valid military ID. The Preservation Society offers a $15 discount on memberships which ends up cheaper than the 5 House Ticket for a Dual Membership and Household Membership.

10 Tips for Visiting the Newport Mansions
- Try to visit during the week and first thing in the morning for fewer crowds.
- Headsets are available at the majority of the homes in various languages with the exception of Chateau-sur-Mer which is a guided tour.
- Wear comfortable walking shoes, you’ll be standing and walking most of the day.
- Most of the houses are within walking distance of each other, but each of them has free parking lots with the exception of the Hunter House where you can find street parking.
- If you do not have a car, public transportation is provided by the Rhode Island Public Transportation Authority. Hop on a trolley at the Newport Gateway Visitor Center, 23 America’s Cup Avenue.
- Photography is now allowed inside the mansions. You’ll want to use the panorama setting on your phone to capture the rooms in their entirety.
- Strollers are not allowed inside the mansions.
- Give yourself time and spread out the tours over a few days if possible to not be overwhelmed. It is a lot of standing and information to take in.
- Newport mansions Christmas decorations are over the top so it’s a fantastic time of year to visit.
- Don’t miss the 3.5-mile Cliff Walk along the ocean’s rocky ledge and the 8 Best Things to Do in Newport, Rhode Island.
Newport Mansions Map
See below for the Newport Mansions Map so you can plan out your visit.
Unique Places to Stay in Newport, Rhode Island
Disclaimer: This post contains affiliate links, if you book through our link we will receive a small commission at no additional cost to you. Thanks for help to support the blog!
Have you been to Rhode Island? What do you think are the best tours of Newport mansions to take?
Quito, the capital, is most likely where you’ll either begin or end your journey in Ecuador. And what better destination than the first city ever to be declared a UNESCO World Heritage Site!
Within the bustling metropolis, there is a lot to see and do so make sure to plan at least a few days to explore. From breathtaking viewpoints to extravagant cathedrals, here are my recommended best things to do in Quito.
We spent seven weeks in Ecuador, another helpful article to read next is Important Tips and Things to Do BEFORE Arriving in Ecuador.
1. Join a Free Walking Tour
One of the best free things to do in Quito is to join a walking tour. It is a fantastic introduction to the city and the perfect thing to do on your first full day in Quito, Ecuador.
You’ll meet other visitors as well and get a crash course on some of the traditions and history of the country.
Every tour is slightly different, but on ours, we walked to the city market, tried popular fruits and drinks specific to the region, visited a Cathedral and a beautiful boutique hotel, and learned about and sampled some famous Ecuadorian chocolate.
If you’d like to know who we booked through or more detailed info, read What to do in Quito for One Day – A Walking Tour.

2. Ride the Teleférico Cable Car
Another must-do on your itinerary is to take the Teleférico cable car.
At 12,943 feet high, it is one of the highest aerial lifts in the world.
The sky tram glides up the slopes of the Pichincha Volcano roughly 2,700 feet in a little over 10 minutes. It is quite the ride!
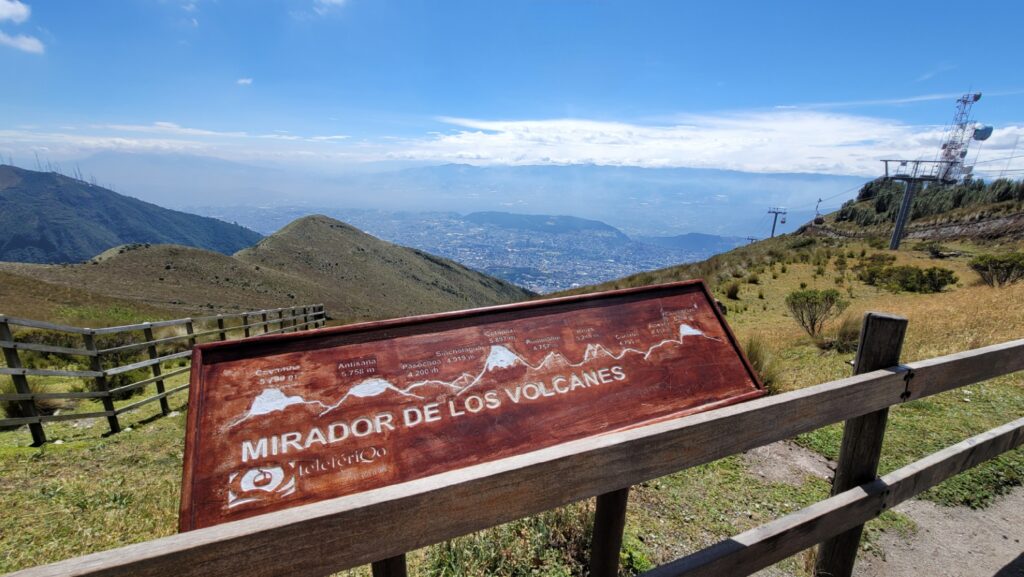
The views are stunning but at that high altitude, you will notice a difference in your breathing. It’s one of those experiences you want to do after being in Quito for a few days after you acclimate.
At the top, you’ll find a few things to keep you busy. You can swing in the clouds which we thought was just a cheesy photo opp, but it ended up being a lot of fun!
Looking for another Do-Not-Miss-Experience in Ecuador?
How to Visit the Ecuadorian Amazon
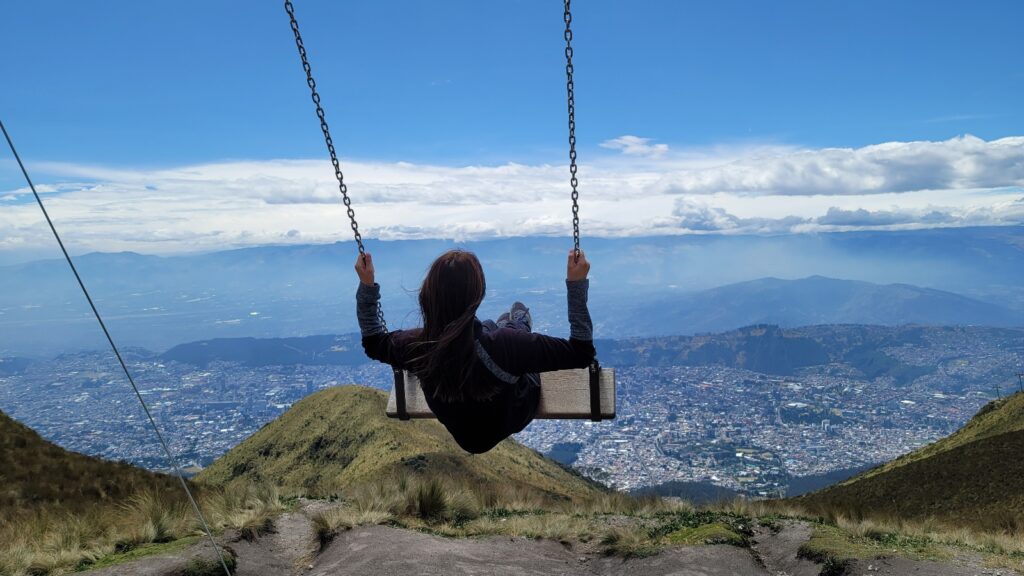
There’s something special about being on a giant swing set in the sky overlooking the city. It’ll have you grinning from ear to ear.
3. Hike to the Summit of a Volcano
Another popular activity at the top of Cruz Lomo Plateau from the cable car is hiking Rucu Pichincha, a challenging trail that goes up over 15,000 feet.
But, oh is it stunning!
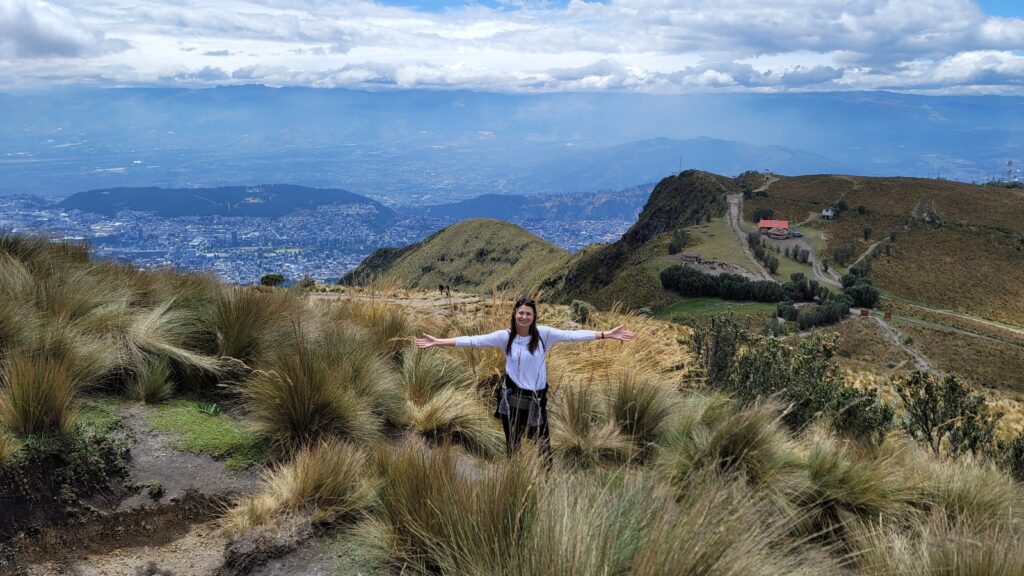
You’ll be rewarded with extraordinary panoramic views of Ecuador’s magnificent volcanoes. Read more about the Ruca Pichincha hike here.
4. Tour the Towers at the Basilica of the National Vow
Even if you are not religious, put the Basilica of the National Vow on your itinerary.
We have visited countless cathedrals and churches during our travels, but this Basilica really stands out.

The grand building was designed by the French architect Emilio Tarlier, who was inspired by the Parisian Cathedral of Notre Dame.
You’ll see Ecuador-themed gargoyles watching guard outside and exquisite stained glass on the inside.
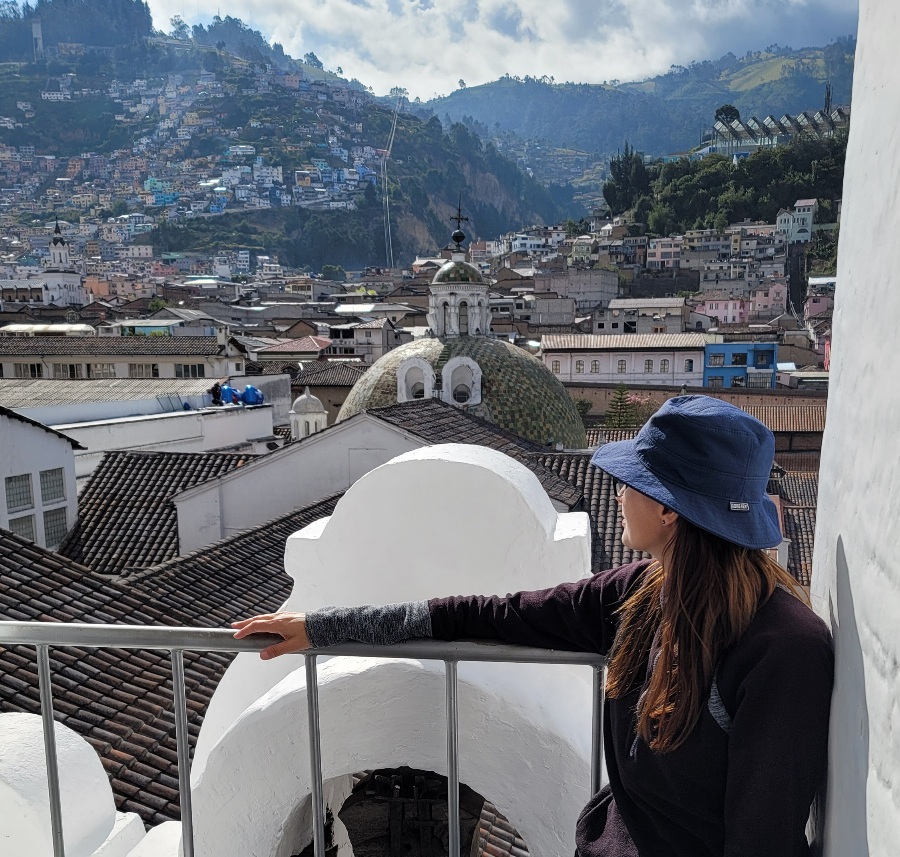
It is one of the largest neo-Gothic basilicas in the Americas and not only has stunning architecture, but you also get spectacular views of the city from the towers.
The tower ticket is only $3.00 per person which can be purchased outside at the entrance of Carchi and Venezuela.
It allows you to view the inside of the basilica from an elevated balcony before climbing three towers of one of the tallest structures in the city. It’s on your own and not guided which makes the experience one of the unique things to do in Quito.
The two front towers are 377 feet high (115 meters) and the stairs keep going round and round inside until you reach the top.
Note: there is an elevator option but that just isn’t as much fun.

The third tower is open air and the steps are super steep making it a very special experience. Once you get to the top, you are rewarded with views of the two towers and the other side of the city.
Related: Best Restaurants in Quito
5. Visit the Pululahua Geobotanical Reserve
Just a 45-minute cab ride from historic Quito is the Pululahua Geobotanical Reserve – one of only two volcanic craters in the world inhabited by humans and the only one that is farmed!
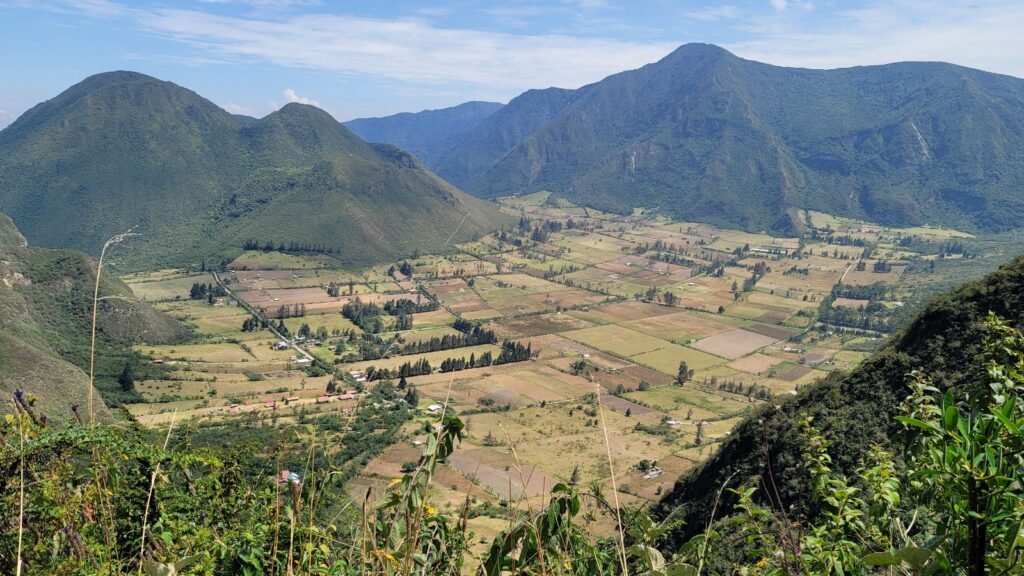
It’s free to enter with an Uber ride roughly $11 and is a great combo with The Middle of the World City only 10 minutes away. If you do not feel comfortable taking public transportation, book an all-day tour that leaves from Plaza Grande here.
The driver will drop you off at the top of the crater so you either take in the view at an overlook or make a hike of it.
The 1.2-mile (1.8 kilometers) trail is tough but worth it. It’s a steep and rocky trail that winds down to the small village at the bottom.
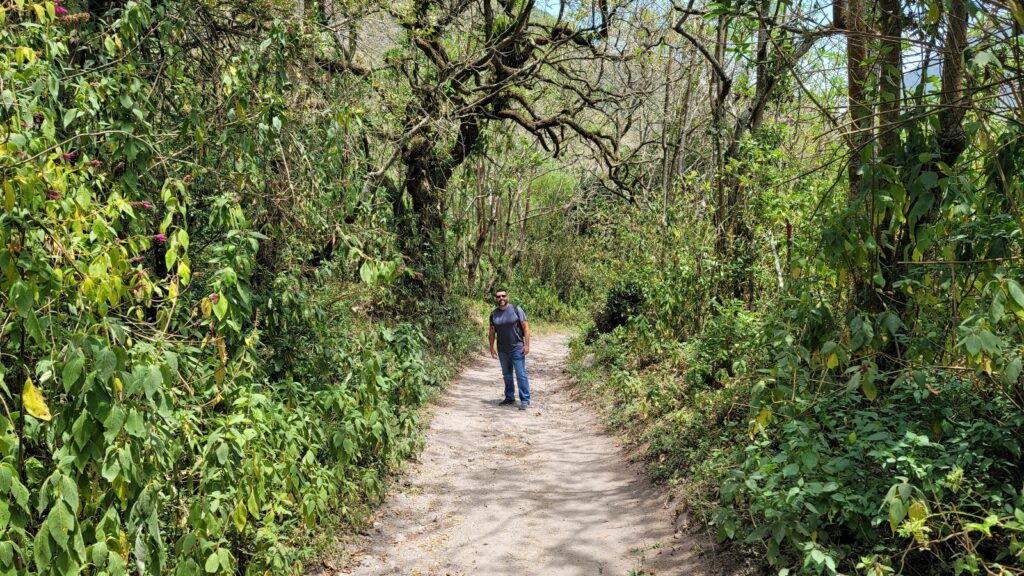
On the weekends, there are a few restaurants open in the village but if visiting during the weekdays plan ahead. The souvenir shops and one cafe with drinks and snacks are open for business at the top every day.
6. Straddle the Equator
With the Pululahua Geobotanical Reserve only three miles away from the Middle of the World City, combine the two for a day trip.
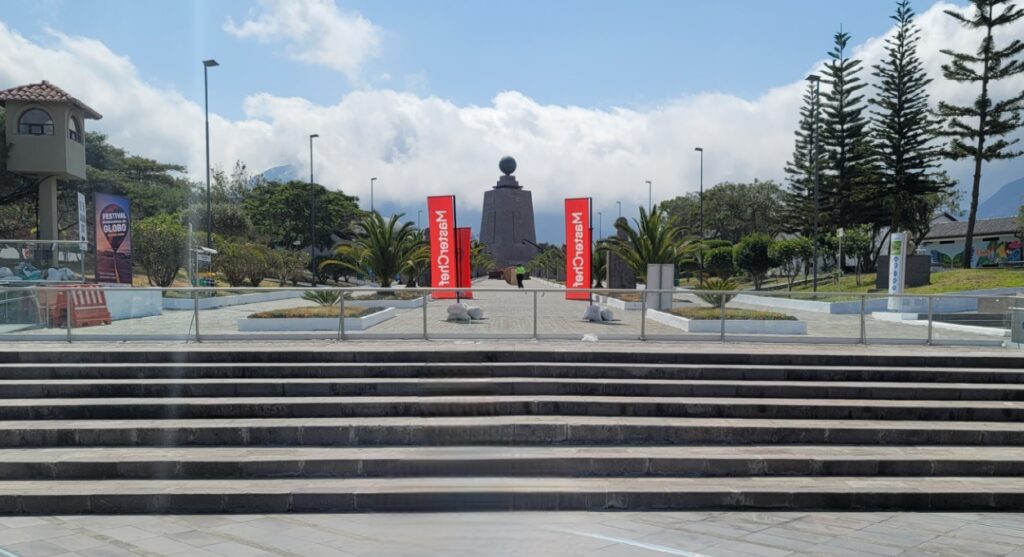
Take an obligatory picture standing on the equator, conduct interesting experiments, shop for artisanal souvenirs, visit the monument, see a live performance, and experience the cultural exhibits at the Mitad del Mundo.
7. See the Church of the Society of Jesus
The Church of the Society of Jesus is one of those buildings that even if you didn’t have on your list of places to see and you walked by, you’d stop in.
With its ancient-looking volcanic stone and twisted columns, the facade beckons travelers to enter.
Once inside, you’ll be amazed at the amount of gold-covered ornamentation and elaborately decorated artwork.

Related: Things to Do in Quito at Night
8. People Watch at Plaza Grande
The heartbeat of Old Town is found at Plaza Grande, the historical center of the city. It’s where locals and visitors alike soak in the colonial architecture and bustling atmosphere.
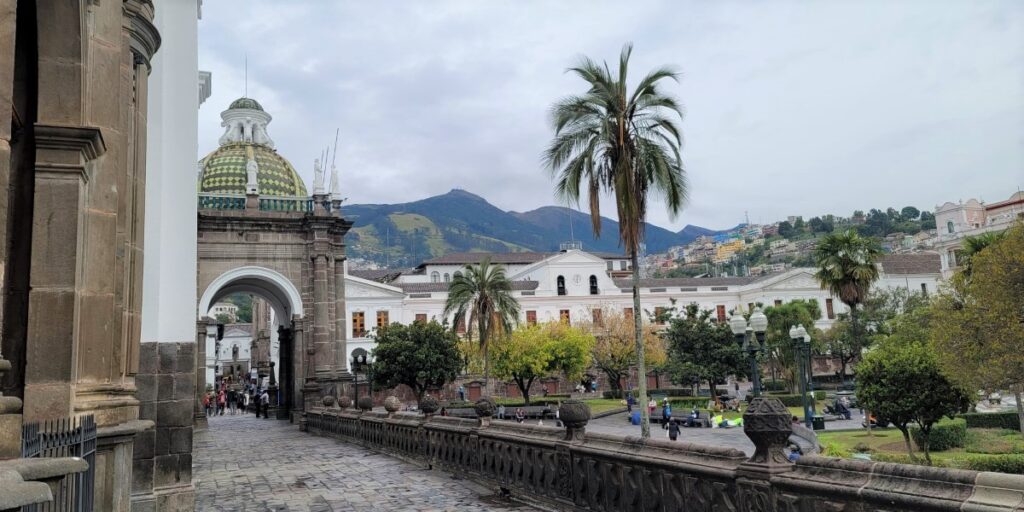
At the center is a large monument, Heroes of the Independence, standing tall in honor of the first attempt at independence from the Spanish Monarchy.
Surrounding the square are important buildings such as the Presidential Palace, City Hall, Archbishop’s Palace, and the Metropolitan Cathedral.
Enter the Arch Bishops Palace on the north side to find restaurants on balconies overlooking a charming patio serving up traditional Ecuadorian food.
Tip: If you’re visiting Quito on a Monday, plan to visit around 11:00 am for the changing of the guard ceremony in front of the Presidential Palace.
9. San Francisco Monastery and Church
The Convent of San Francisco was started by three Franciscan Monks between 1537 and 1560.

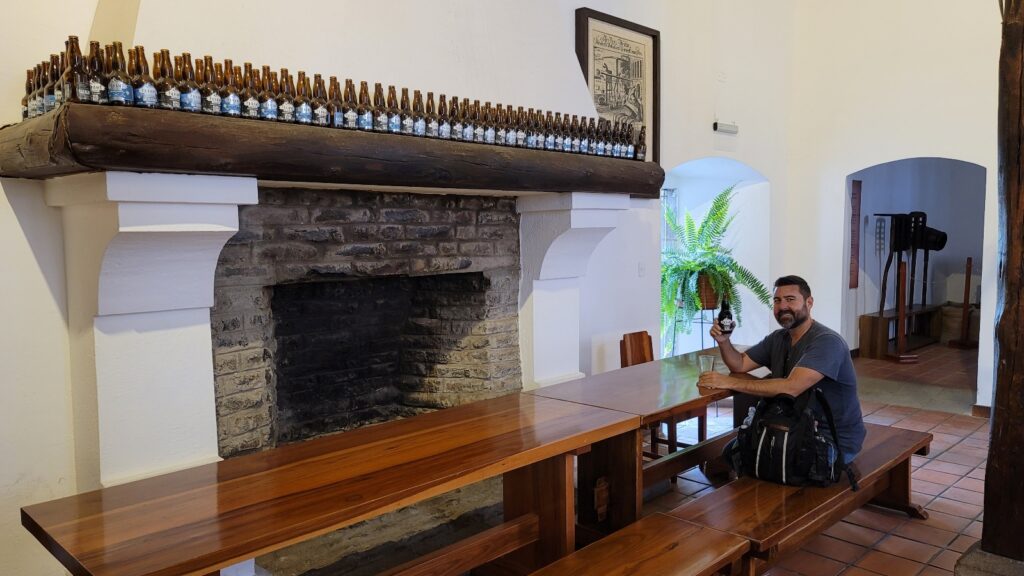
For a small fee, you can walk around part of the vast complex and see a few of the cloisters, more than 3,500 works of religious art, try a local craft beer in the Antigua Cerveceria (where the monks used to brew their own beer), take in a special overlook of the San Francisco Church from a balcony, and climb the bell tower for more views of the city and plaza.
10. Parque La Carolina and the Quito Botanical Gardens
The sprawling Parque La Carolina provides the perfect escape from the hecticness of the big city.

The beautifully landscaped park is home to a small lake with paddleboats, lovely botanical gardens, a children’s library, multiple playgrounds, an auditorium, bike paths, a skatepark, tennis courts, and numerous food stalls.

What to Do in Quito for a Week
If you’re staying for more than a few days, here are other things to do in Quito that we enjoyed.
- La Ronda
- El Panecillo
- Parque El Ejido
- Banditos Brewery
- Espejo Street
If you are asking yourself, is it worth visiting Quito Ecuador? The answer is yes! Quito offers plenty of things to do and see!
Pin it for Later!
Glacier National Park easily tops my list of favorite national parks in the United States. Montana’s crown jewel is home to over one million acres with 130 spectacular lakes, five National Historic Landmarks, two mountain ranges, and hundreds of species of animals.
Unfortunately, the landscape is ever-changing and the park will completely transform in the coming years “depending on how and when we act.” The park, once home to 150 glaciers, only has 25 remaining and they are retreating fast. Projections suggest that because of climate change, in several decades the remaining few, may all be gone.
So you know what that means. It’s time for a visit!
Before we get you to the 5-day Glacier National Park itinerary and travel guide with tips and the can’t-miss places for your trip, let’s discuss some other important information.
2024 Update: In an effort to reduce congestion, reservations are required from May 24th – September 8th from 6:00 am to 3:00 pm to access Going-to-the-Sun Road beyond Apgar Village and North Folk. New this year, the reservation will only be good for one day only versus three days in previous years. Reservations are required from July 1 – September 8th from 6:00 am to 3:00 pm to access Many Glacier. Click here to read more information about the ticketed entry requirements. Vehicle reservations are required in each separate area.
How can I see Glacier National Park without a reservation?
– Arrive before 6 am or after 3 pm at the North Fork, Two Medicine, or Many Glacier (only after 3 pm for Going-to-the-Sun Road) during designated dates.
– Book one of the many guided Glacier National Park tours such as horseback riding, guided hikes, or boat rides within the park)
How Many Days Do You Need in Glacier National Park?
You do not have to be an avid hiker or even outdoorsy in general to appreciate the raw natural beauty of Glacier. You’d be missing out though if you didn’t explore some of the 700 miles of hiking trails.
It is one of those places that wows even the most stoic. It is roughly 1,500 square miles of alpine meadows and dense forests with magnificent panoramas, tumbling waterfalls, and glistening lakes
Whether you are planning to stop in Montana on a cross-country road trip like we did or it is the main destination, you should plan for at least five to seven days to see all the spectacular things Glacier has to offer.
Tips for Visiting Glacier National Park for the First Time
-
-
- Plan ahead. Glacier, along with many of the national parks, is a popular destination with limited facilities. Reservations open up 13 months in advance. On the first of each month, the park begins accepting reservations for the entire month of the following year. For example, on September 1, they will accept reservations through September 30 of the following year.
- Pack a sturdy pair of women’s hiking shoes or men’s hiking shoes, whichever applies. I prefer trail runners or hiking shoes that don’t cover my ankles since it tends to rub, but if you prefer hiking boots, make sure to pick a durable and breathable pair.
- Bring a good day pack to carry lunch, snacks, and water for your daily hikes.
- Be up early! Get out by 8 am and you will not have a problem with parking or crowds.
- Always stay alert and remember to respect the animals and their space. Do not approach any wildlife and absolutely never turn your back on an animal to snap a selfie.
- Cell coverage is sparse so download a Glacier National Park map, itinerary, and any other necessary information beforehand.
- Download National Parks by Chimani. It is a free app for your phone that has detailed guides, including GPS-enabled maps that can be used offline.
- Layer up. The weather can and does change often, especially when hiking in high elevations. Even in July we started out with flowers in a meadow and ended up hiking through snow.
- It is highly recommended by the park to utilize the free shuttle system that runs along the Going-to-the-Sun Road between Apgar Visitor Center and St. Mary Visitor Center.
- If driving in the park, always add extra time. Glacier is very busy with one major road going through it which can get congested at times.
- Bring your passport if you are going to include a day at Waterton Lakes National Park over the border in Canada.
-
BEAR SAFETY:
-
-
- Any activity within 100 yards (91.4 meters), such as approaching, viewing, or engaging bears or wolves, or within 25 yards (23 meters) of any other wildlife is prohibited.
- Always make noise when walking especially when taking a corner. You can play music, where a bear bell, clap your hands, and/or yell out, “Hey bear!!!” every once in a while. If possible do not hike alone.
- Purchase bear spray before arriving to give you peace of mind. *Note: you cannot fly with bear spray so purchase only after arriving if coming by plane.*
- Ask a ranger. It’s always advisable to ask about bear activity in the areas you are hiking.
- Be aware that bears, like most animals, are more active at dusk and dawn.
- If you see a bear along the side of the road, do not stop near the animal. Pull over at a safe location at least 100 yards away.
- Food should always be stored in vehicles or in bear-proof canisters or lockers.
- RELATED: WHAT TO DO IF YOU ENCOUNTER A BEAR
-
What is the Best Month to Visit Glacier National Park?
With melted snow and comfortable temperatures, July and August are the best months to visit Glacier National Park, making these months peak tourist season.
And because of the limited timeframe, it makes our Glacier National Park Travel Guide very important in the planning process.
Top 7 Things to Do in Glacier National Park – DO NOT MISS
- Going-to-the-Sun Road
- Grinnell Glacier Hike
- Trail of the Cedars and Avalanche Lake
- Hidden Lake Trail
- Lake McDonald
- Highline Trail
- Virginia and St. Mary Falls
You can save the Glacier National Park itinerary map above to your Google Maps account by selecting the star icon.
To view it, open Google Maps on your desktop or on your phone, select the menu button, go to “Your Places,” scroll to the right to Maps, and you will see this map.
DOWNLOAD OR SAVE THE OFFICIAL GLACIER NATIONAL PARK MAP HERE
How to Get Around Glacier National Park
The national park service highly recommends utilizing the free shuttle service offered between Apgar Visitor Center and St. Mary Visitor Center. It runs from early July to mid-September depending on the weather. Shuttles are air-conditioned and have large windows for viewing the park as you drive. They run every 15 – 30 minutes from 7:00 AM to 7:00 PM.
If you are not an early riser, I recommend using the shuttle system as there is limited parking available at each trailhead and visitor center. If you can wake up and get moving with the sun then you’ll most likely find a parking spot. Always have an alternative hike or destination in mind though just in case.
BEWARE: There are size restrictions on Going-to-the-Sun road. Any vehicle combinations longer than 21 feet (including bumpers) or wider than 8 feet (including mirrors) are prohibited between Avalanche Campground and the picnic area parking lot at Rising Sun. Due to overhangs, vehicle combinations over 10 feet in height may have issues driving west from Logan Pass to the Loop.
Available at various locations within the park are the famous Red Buses that provide tours around the park.
East side departure points include Swiftcurrent Motor Inn, Many Glacier Hotel and Rising Sun Motor Inn, a few spots in the town of St. Mary’s, Johnson’s hotel guests and at the Glacier Park Lodge in East Glacier.
West side departure points include Apgar Visitor Center, Village Inn at Apgar and Lake McDonald Lodge, and a couple of spots near the west entrance to the park.
Scroll below the itinerary for my top picks on lodging!
5 DAY TRAVEL GUIDE TO GLACIER NATIONAL PARK
This adventure-filled Glacier National Park itinerary will take you to all the places you’ll want to experience in and around the park including a day trip to Waterton Lakes National Park in Canada.
Day 1 – Getting to the Park
You’ve arrived! Make the most of your travel day when you get to Glacier National Park. Settle in; pick up groceries, snacks, and drinks and check in to your hotel or campground. If you flew in, remember to pick up bear spray (available at Walmart and stores inside the park) for peace of mind.
CHECK OUT OUR BEST FREE APPS FOR A U.S. ROAD TRIP
Where to Find Groceries near Glacier National Park
-
-
- Walmart Supercenter near West Entrance: 170 Hutton Road, Kalispell, MT
- Canyon Foods near West Entrance: 8900 Hwy 2 E, Hungry Horse, MT
- Smith’s near West Entrance: 419 Nucleus Avenue, Columbia Falls, MT
- Mary Grocery near East Entrance: 3 Going-to-the-Sun Hwy, St Mary, MT
- Walmart Supercenter on the way from Yellowstone National Park, 1500 N. 7th Avenue, Bozeman, MT
- Many of the campgrounds and lodges also have stores with limited supplies and are often more expensive so I suggest picking up what you need beforehand.
-
Head to a visitor center to pick up maps, ask questions, and watch an introductory video about the park before taking a short hike to stretch your legs.
An easy must-do hike in Glacier National Park is St. Mary and Virginia Falls near the east entrance of the park. It’s a 3.6-mile round trip flat hike where a trail leads you through a burned forested area that is surprisingly breathtaking then to two awesome cascading waterfalls.
FIND OUT WHICH CELEBRITY WE RAN INTO ON THE VIRGINIA FALLS TRAIL
Day 2 – Central Section
Wake up early (maybe even catch the sunrise) and begin the day on the jaw-dropping beautiful Going-to-the-Sun Road that cuts directly through Glacier National Park. Once you get a glimpse of what this scenic drive has to offer, you will not be disappointed that many of the trails are off this incredible road.
*TIP: Remember to look out for wildlife, it’s one of the best times of day to see them.*
Head to Logan Pass Visitor Center, located at the highest point accessible by car at 6,646 feet high. Here you can choose from two hikes: Highline Trail or Hidden Lake Trail.
The Highline Trail is one of the most highly-rated hikes in the entire park and has even been touted as one of the best in all of America and with good reason. It provides remarkable views and chances to see wildlife and beautiful wildflowers.
Because of its popularity, is another reason we recommend arriving as early as possible. And since it’s an out-and-back, you don’t necessarily have to hike the entire route, you can make it as long or short as you’d like.
Highline Trail, Glacier National Park
Here are a few things you need to know if you choose the Highline hike:
-
-
- Only open if the snow has melted and conditions are given the okay from park rangers (check inside the visitor center for information).
- Usually open from mid-July to August.
- Strenuous with steep drop-offs.
- Roughly 12 miles out and back.
- 2,000-foot elevation gain.
-
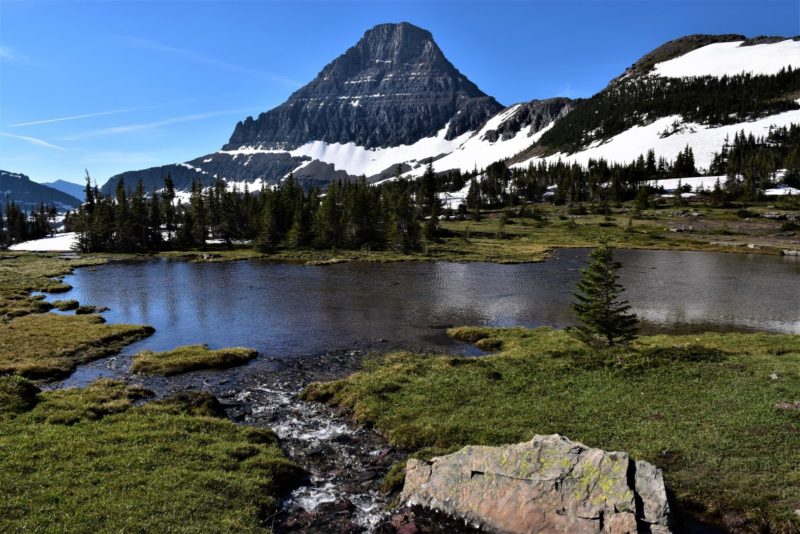
If that trail is closed due to weather or you’d like something less challenging try the Hidden Lake Trail. One of the best places in the park to see mountain goats and bears. And when there’s no snow on the ground, it is wildflower mania carpeting the meadow.
Hidden Lake Overlook Trail
Here are a few things you need to know if you choose the Hidden Lake Overlook Trail:
-
-
- Can hike even if there is snow on the ground.
- Easy with no snow on the ground, Moderate with snow.
- Roughly 3 miles out and back.
- 500-foot elevation gain.
-
*Tip: Don’t forget your camera and bear spray, we saw our first grizzly here!*
RELATED: WHAT IT WAS LIKE HIKING WITH A GRIZZLY BEAR
After hiking, drive the rest of the 50-mile extraordinary Going-to-the-Sun Road. It is one of my favorite experiences in all of our travels so far. Be patient. Take your time. And enjoy.
It will take a few hours between the slow driving and stops along the way.
Day 3 – West Section
Spend the day hiking in the west section of Glacier National Park near Lake McDonald, the largest lake in the park. First, take the Cedars Nature Trail to Avalanche Lake, a 4.5 mile easy round trip walk through a narrow gorge contoured with green moss and glossy stones finishing at a shimmering clear lake.
Lake McDonald Area
Afterward, take a short stroll around Johns Lake about one mile east of McDonald Lodge on the Going-to-the-Sun road. Under two miles long and relatively flat, the loop trail is easy and won’t take long. Then stop in at the Lake McDonald Lodge, nestled on the shoreline, to enjoy the rustic ambiance and historic feel. Grab a drink at Lucke’s Lounge or a meal at Russell’s Fireside Dining Room.
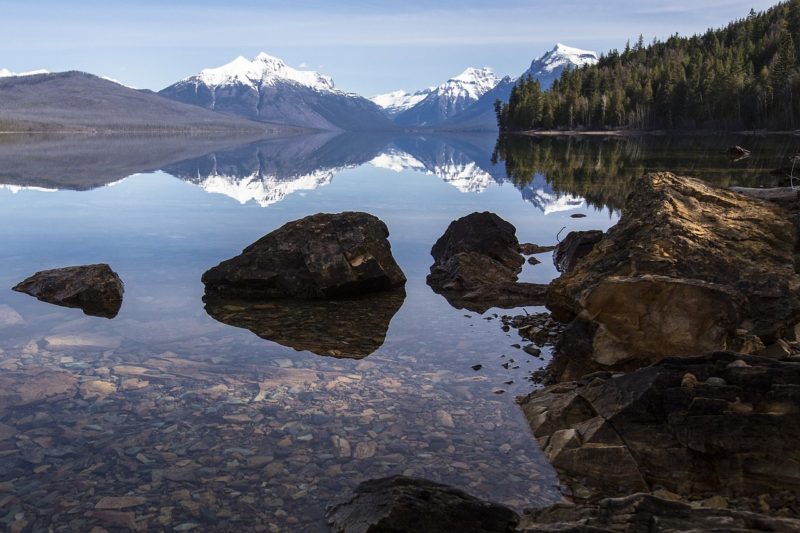
End the day at the southwestern side of Lake McDonald near Apgar Village to experience that Instagram-famous shot of the lake with the colorful rocks under the crystal clear water framed by the mountains.
*Tip: Don’t forget to bring binoculars!*
Day 4 – Many Glacier Section
After visiting over 20 national parks, I have a few hikes that go down as my favorites like Angels Landing in Zion, the Beehive Trail in Acadia, and Grinnell Glacier in Glacier. DO NOT MISS THE MANY SECTION OF THE PARK!
You can adjust this hike to many different skill levels so make sure no matter what your hiking background is, you don’t skip this unforgettable scenic area. The Grinnell Glacier Trail, to this day, remains one of the most terrifying and rewarding hikes I’ve been on. Click on the above link to read about our experience hiking the memorable trail.
Start your day with a breakfast buffet at the historic Many Glacier Hotel. The food isn’t the greatest but it’s all you can eat to prepare you for the long hike ahead of you and the views are unparalleled.
After breakfast, make your way behind the lodge to either the boat dock or trailhead. You can shave roughly 3 miles off the 10-mile hike if you choose to take the shuttle boats across the lakes. If you are short on time go ahead, but I HIGHLY recommend hiking the entire path if possible. The first two miles are relatively flat with fantastic views of Swiftcurrent Lake and Lake Josephine.
Grinnell Glacier Trail
The Grinnell Glacier Trail connecting back to the Grinnell Lake Trail is roughly 12 miles round trip with a 1,800-foot elevation gain. Expect to be rewarded with sensational view after view and a day full of gasping at the landscape before you. We chose to extend the hike a little longer by taking the Grinnell Lake Trail back for a different perspective than going out and back. We saw a moose and her baby and enjoyed the lake scenes so I would suggest it. If you go all the way to Grinnell Lake, be prepared for a short visit because the mosquitos are annoying on the lookout.
And after all that climbing and walking, make sure to stop by the bar at the hotel for a local craft beer like a Wild Huckleberry, you deserve it!
*TIP: As with all hiking in Glacier, do not forget your bear spray. We saw a mom and cub right on the trail.*
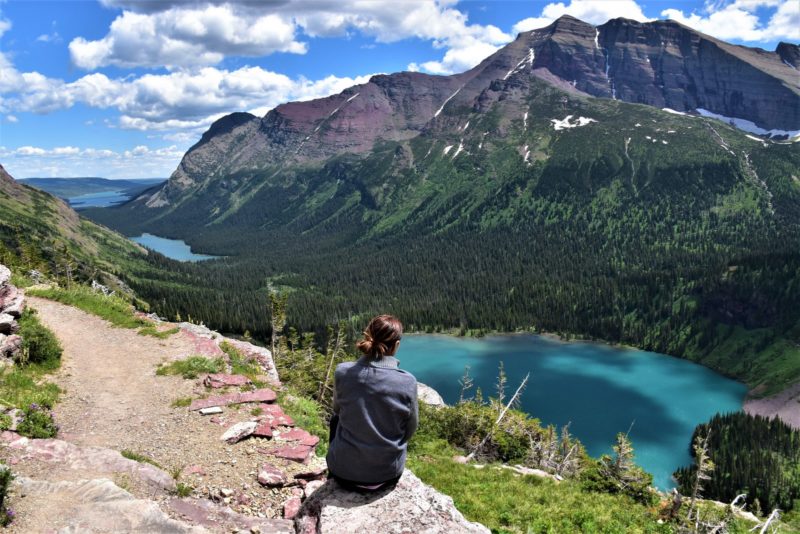
Day 5 – A Day at Waterton Lakes National Park or Take a Hike
You have two choices today: explore more of Glacier or head to another national park. You are probably thinking, why spend a day outside the park? It is a bit of a drive and you do have to remember to bring your passport because you’ll be crossing over the border, so it’s not something you necessarily HAVE to do but we are glad we did. It was an exceptionally cold and windy day plus our legs were sore from the Grinnell Glacier hike so we decided to take a drive to see what the park was all about.
You can read about how we spent the day at Waterton Lakes National Park here.
If it’s your first time in Glacier or you only have a few days then I suggest skipping Waterton and exploring more of Glacier. BUT if you’ve been before, have extended time, or are heading to Canada again on this trip or another this year then Waterton should make your itinerary.
The park and lodge are picturesque, it wasn’t overrun with tourists and we saw five bears from the car! I’d say, it was worth the extra mileage and cost. If you are continuing your road trip up through Canada after Montana, purchase the Discovery Pass which has unlimited access to all Canadian parks.
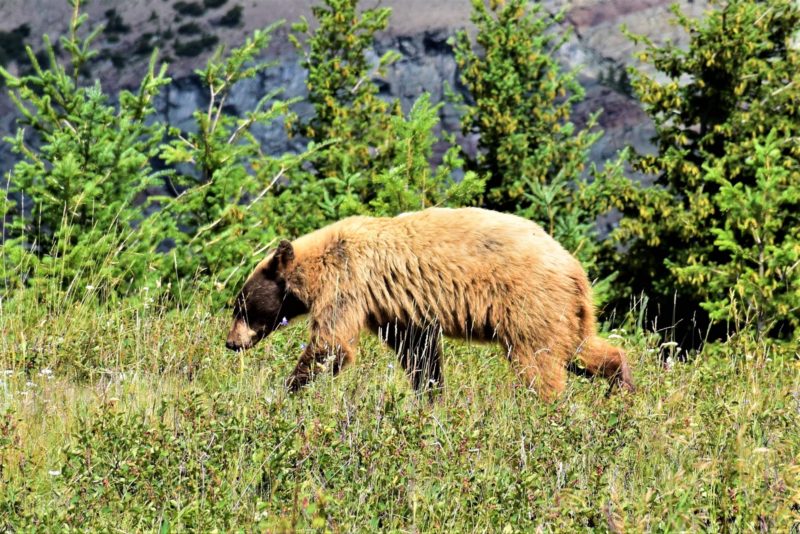
READ NEXT: TOP 10 THINGS TO DO IN BANFF NP
Waterton Lakes National Park and Glacier National Park share a lake at the border and in 1932 the two were combined and designated Waterton Glacier International Peace Park, the first of its kind in the world. It is also a UNESCO World Heritage Site.
Make sure to stop inside the Prince of Wales Hotel for afternoon tea or a drink with a magnificent view, walk around town, check out Cameron Falls, and hike the short but steep Bear’s Hump Trail right by the Visitor Center for the best view in the park.
Other Best Hikes in Glacier National Park
If you are not interested in taking a drive out to Waterton, check out these other highly-rated day hikes in Glacier:
- Cracker Lake: 12-mile moderate round-trip with a 1,400-foot climb in the Many Region.
- Iceberg Lake: 9.7 mile easy to moderate round-trip with a 1,200 foot elevation gain in the Many Region.
- Ptarmigan Tunnel (an addition to Iceberg Lake hike above): 11 mile strenuous round trip with a 2,300 foot elevation gain in the Many Region.
- Cobalt Lake: 11.4 moderate round-trip with a 1,450-foot elevation gain in the Two Medicines Region.
How to Get to Glacier National Park
Glacier National Park is in the northwest corner of Montana running along the ridge of the Rocky Mountains.
Flying is the quickest form of transportation to the area with flights between 2 – 5 hours from many major U.S. cities. Glacier Park International Airport in Kalispell is the closest airport to the national park near the west entrance and houses Alaska Airlines, Allegiant, Delta Airlines, and United Airlines.
The Great Falls International Airport in Montana is roughly 150 miles from the east entrance. It serves a few major airlines such as Delta, United, Alaska Airlines, and Allegiant Air. Rental cars are then available at all airports to get you around on your trip.
Set up an Airfare Alert via AirfareWatchdog
Amtrak also offers stops in East Glacier, West Glacier, and Whitefish. A vehicle is not necessarily a must to visit the park, but I would recommend it since you will be limited as to where and when you can explore. If you are staying within the park, you can use the free shuttle service to get around or take guided tours.
Related: Missoula to Glacier National Park Itinerary
Best Option
In my opinion, the BEST way to get to Montana is to drive. If you are from the U.S. and you have time, visiting the park is the perfect opportunity for a road trip. It allows you to bring your own tent, trailer, or RV which opens up so many lodging options near the park. Since it is a popular destination and so large being able to camp is helpful for planning purposes.
We drove the 1,500-miles or so from Chicago on a mega road trip hitting Badlands National Park and Yellowstone National Park first then wheeled up north to Banff National Park and Jasper National Park in Canada. It was an unforgettable trip that we will be talking about for years to come.
READ NEXT: RV RENTING FOR BEGINNERS
Glacier National Park Lodging
There are many accommodation choices in the area, anywhere from romantic lodges to basic tent sites. Any type of traveler can find suitable choices but the key is to book early.
Glacier has thirteen campgrounds and only a few take reservations: Fish Creek, St. Mary, and some of Many Glacier. The remaining are first come, first served. Inns and lodges within the park boundaries book up fast but have cancellations often so periodically check the website for openings. Beware no camping sites inside Glacier NP have electricity, water or sewer and have limits on generator usage.
We camped at St. Mary Campground on the east side of the park, one of the few that takes reservations.
READ NEXT: CAMPING AT ST. MARY CAMPGROUND IN GLACIER
Lodging Options near East Entrance Outside the Park
Lodging Options near East Entrance Inside the Park
-
-
- Rising Sun Motor Inn ($$$)
- Mary Campground ($)
- Rising Sun Campground ($)
-
Lodging Options Inside the Park Centrally Located
-
-
-
- Lake McDonald Lodge ($$$)
- Motel Lake McDonald ($$$)
- Avalanche Creek Campground ($)
- Sprague Creek Campground ($)
-
-
Lodging Options near West Entrance Outside the Park
Lodging Options near West Entrance Inside the Park
-
-
- Apgar Village Lodge ($$$)
- Village Inn Motel
- Apgar Campground ($)
- Fish Creek Campground ($)
-
Lodging Options near Many Glacier Entrance Inside the Park
-
-
- Many Glacier Lodge ($$$)
- Swiftcurrent Motor Inn ($$$)
- Many Glacier Campground ($)
-
What would you add to this itinerary for Glacier National Park? Tell us in the comments below!
Disclaimer: This post contains affiliate links, if you book through our link we will receive a small commission at no additional cost to you. Thanks for supporting the blog!
Like it? Please save it!
